


Ingredients
For the cookies::
- 3 sticks (339 grams) unsalted butter, at cool room temperature
- 1 1/2 cups (300 grams) granulated sugar
- 2 large eggs
- 2 teaspoons vanilla extract
- 1/4 to 1/2 teaspoon almond extract (optional)
- 4 1/2 cups (572 grams) all-purpose flour
- 1 teaspoon baking powder
For the border icing::
- 1 cup (125 grams) powdered sugar, sifted (plus more as needed)
- 1/2 teaspoon vanilla extract
- 1 to 2 tablespoons water or milk
- Food coloring, if desired
For the flood icing::
- 1 cup (125 grams) powdered sugar, sifted (plus more as needed)
- 1/2 teaspoon vanilla extract
- 2 to 3 tablespoons water or milk
- Food coloring, if desired
Directions
Make the cookies:
-
In a large bowl, use an electric mixer to beat the butter and sugar on medium-high speed until well-combined and smooth, about 3 minutes. Add the eggs, vanilla, and almond extract and beat until combined. On low speed, slowly add in the flour and baking powder and beat until incorporated.
-
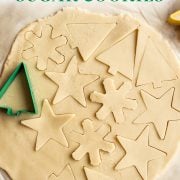
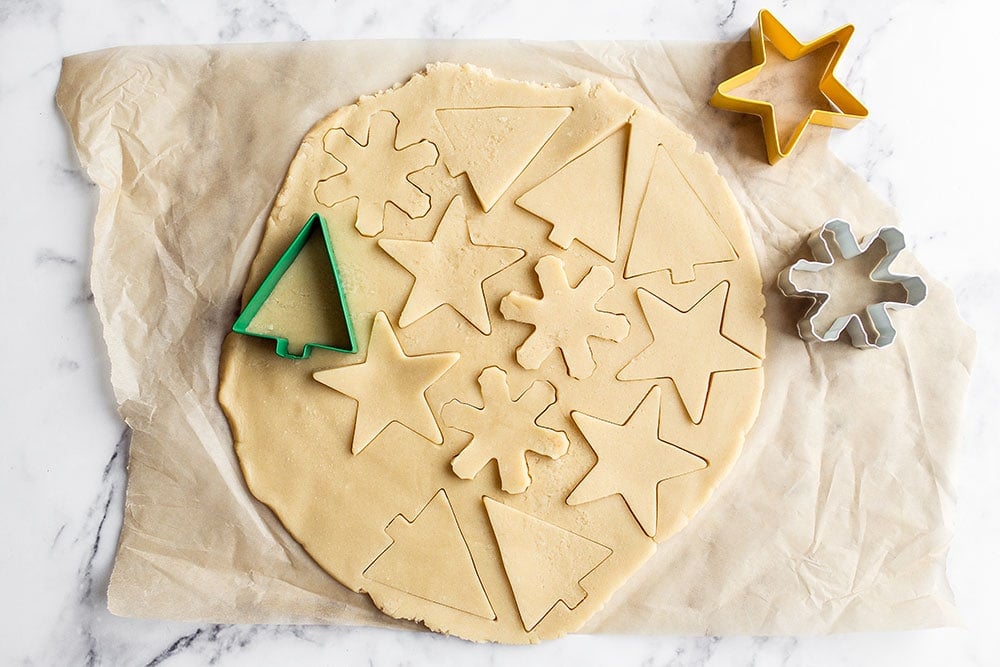
Divide the dough into 2 equal portions. Place one dough portion between two sheets of parchment and roll out to 1/4-inch thickness. Repeat with the remaining portion of dough. Place the two sheets of dough on a baking sheet and chill for at least 1 hour or up to 1 day. You can also freeze for 30 minutes.
-
Preheat the oven to 350°F. Line large baking sheets with parchment paper or silicone baking mats.
-
Remove the dough from the fridge and cut into shapes with a cookie cutter, rerolling any scraps and cutting more shapes. Transfer the shapes to the prepared baking sheets.
-
If the dough is too warm, freeze for 15 minutes or until firmed again.
-
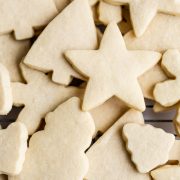
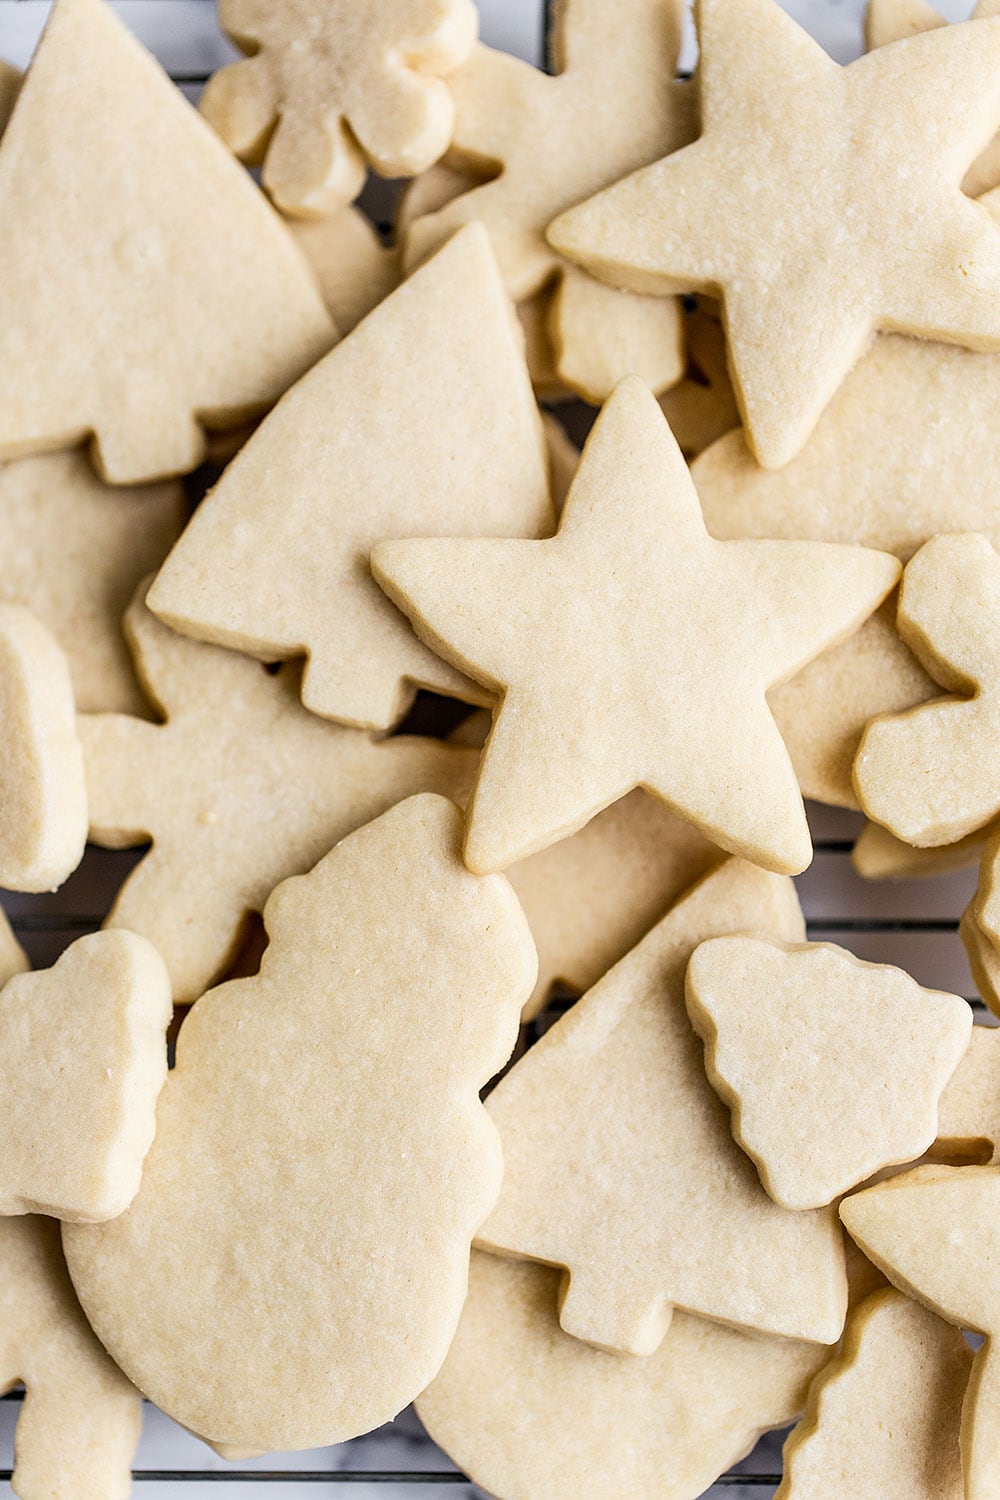
Bake for 10 minutes, or until the cookies are set and begin to brown. Be careful not to over-bake. Let the cookies cool for 5 minutes before removing to a wire rack to cool completely. Baked un-iced sugar cookies can be frozen in an airtight container for up to 1 month.
For the border icing:
-
In a small bowl, use a fork to beat together all the ingredients except the food coloring. Beat in the food coloring, a few drops at a time, until colored to your liking. The mixture should be very thick but still pourable. Add more powdered sugar as needed.
-
Transfer the border icing to a squeeze bottle using a funnel. You can also scoop into a pastry bag fitted with a small plain tip. Before you begin icing any cookies, take a few moments to practice on a piece of parchment paper to get the feel of the icing.
-
Holding the bottle or bag tip directly over one corner of a cookie, begin tracing an outline of the cookie, squeezing gently and using both hands if needed to maintain consistent pressure. I prefer to allow a little slack in my icing line as I go. If you mess up, simply wipe the icing off and start again. Allow the icing to dry slightly before continuing with the flood icing.
For the flood icing:
-
In a small bowl, use a fork to beat together all the ingredients except the food coloring. Beat in the food coloring, a few drops at a time, until colored to your liking. The mixture should still be pretty thick, but will drizzle more freely than the border icing. If needed, add additional water or milk to loosen until the consistency is pourable. Pour the flood icing into a squeeze bottle or into a pastry bag fitted with a small plain tip.
-
Prepare as many batches and colors of flood icing as you need to decorate your cookies.
-
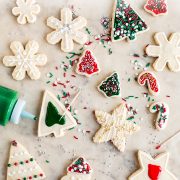
Begin filling the interior of the border drawn on each cookie with the flood icing, being careful not to add too much that it overflows the border icing. Use either the nose of the bottle or a small toothpick to push the icing evenly over the cookie and up against the corners.
-
Leave the iced cookie to dry for 24 hours. The cookies are dry when the surface is completely smooth, dry, and resists smudging when touched. Store the dried cookies between sheets of parchment paper in an airtight container at room temperature for up to 10 days.
Recipe Notes
The amount of powdered sugar needed for the icing will depend on whether you use milk or water, the sugar brand used, and the humidity of your kitchen. Adjust until you get the desired consistency. For best results, use organic powdered sugar which is made with tapioca starch for a thicker sturdier consistency and better flavor.


Hi, I was wondering if there was anything like a soft cut out sugar cookie that exists? I checked out your soft and chewy cookie recipe, and was wondering if it would work if I used a cookie cutter to shape them? Thanks!
Hi Savannah! This recipe yields cookies that are light and soft, yet sturdy enough to decorate. If you underbake them slightly, they’ll be even softer. Tessa’s Soft and Chewy Sugar Cookie recipe is designed to be a drop-style cookie only, and won’t hold its shape if used for cutout-style cookies. I hope that helps! Happy baking 🙂
I want to start by saying this is my go-to sugar cookie recipe! doesn’t spread and SO delicious!
That being said, I have a question. Last couple times I have made these, about half the cookies get a crinkly appearance on top. There’s no rhyme or reason to it. Doesn’t seem to be related to the rack used (on same pan, some cookies are normal and others are crinkly) or the location on the pan (one next to another will be different). Could this be related to the ingredients I’m using? or how it was mixed?
Again, this is my FAVORITE recipe! I know it’s something I’m doing on my end since it just started and I’ve made this dozens of times with no issue.
Hi Kimberly! We are so glad to hear that you enjoy this recipe so much! Your crinkley cookie issue sounds super strange! Without baking alongside you in the kitchen, it’s hard to say for sure what’s happening, but here are a few thoughts as to what could be happening:
– Your oven temp could be off a little, and/or perhaps the oven isn’t heating evenly. It’s a super common problem, surprisignly – and if you oven has hotter/cooler spots, this could be why just some of your cookies are becoming crinkly as they’re not receiving even heat distribution. Check out Tessa’s article here about ovens! If you don’t have an oven thermometer to ensure your oven is at the temperature it says it is, invest in one now! They are inexpensive and really help your baking so much! This oven thermometer is one of Tessa’s favorites.
– Is it possible that your ingredients aren’t getting mixed in quite enough? We’re all so paranoid about overmixing that sometimes it’s easy to undermix! When small pockets of unincorporated butter hit the heat, they can explode and cause weird textures. Be sure when you’re mixing that you’re scraping down your bowl frequently (sides and bottom) throughout the creaming process, and throughout the remaining ingredient additions, too.
– Just in case it’s helpful, check out Tessa’s article here about creaming butter and sugar.
– Although it seems unlikely because it’s only happening with some of your cookies, I wonder if your baking powder is not as active as it could be? Learn more about chemical leaveners and how to test for freshness here.
I hope something here proves helpful, and you can get to the bottom of this strange cookie mystery! Good luck and happy baking! 🙂
Hi,
I’m looking for a new recipe and would love for it to be a chewy sugar cookie cutout. I saw in your other recipe that you added an egg yoke to make it more chewy and wondered if I could do the same for these?
Hi Perryn! We haven’t tried that, and it may make these cookies a tiny bit sticker and therefore a bit more challenging to handle, but it should definitely make them a little chewier! Underbaking slightly will also help with this. I’m assuming this is the other recipe you have already checked out, but just in case, these Soft and Chewy Sugar Cookies are super chewy, soft and soooo delicious, but they won’t hold a shape as well, so they’re better if you’re happy eating them plain, or okay decorating circles only 🙂 Let us know how your experiment goes if you try that out, Perryn! Happy baking 🙂
I have these cute shapes that form a 3d christmas tree but my cookies are too swollen for it to fit together. Is it possible i made them too thick? Of should i lessen the baking powder? Or not chilly enough? I followed the recipe exactly. Thank you in advance 🙂
Hi Eline! While I’m not familiar with your specific molds/cutters, it sounds like you may need to just roll your cookies a little thinner, and be sure they’re thoroughly chilled when they hit to oven, to prevent excess spreading. Good luck and happy baking 🙂
I would like the icing to set up quickly after decorating the cookies. What would happen if I substitute heavy whipping cream for some or all of the milk or water in each icing recipe? Thank you!
We haven’t tried that, but it should be fine 🙂 I don’t think that will shorten the drying time, but you could try using a dehumidifier or fan (carefully!) to see if that helps. We do recommend a longer period of dry time though to ensure the cookies won’t be damaged. Let us know how it goes!
Made these and they were super easy and delicious and will be my new go-to!
If I wanted to make this and give some to friends, can I put it in a container without having to worry about the icing melting?
Hi Cindy! This icing is quite soft already as it’s made to pipe the border of the cookies as well as used as a flood icing, which is a much thinner icing. You can definitely gift this icing to your friends, just let them know it’s an icing specifically for piping on to cookies 🙂 Hotter temps might make the icing a little more liquidy, but feel free to adjust the amount of powdered sugar needed depending on the humidity of your kitchen, as well as your desired consistency. I hope that helps!
What is the equivalent of 3 sticks of butter? We don’t buy our butter in sticks. I find it confusing because the rest of the recipe is in measurements except the butter.
Hi Steph! We do list the metric measurement for 3 sticks of unsalted butter in the ingredients list, it is 339 grams. Let us know what you think of this recipe 🙂
In the “ingredients you’ll need” section of the post, it says “baking soda.” But the actual recipe says baking powder. I assume it’s baking powder, but just checking. Looking forward to making these for Christmas!
Thanks for catching that, Lindsay! Yes, you are correct, I just updated that section 🙂
Hi, how can I replace egg in this recipe(sugar cookies)
Regards,
Roma
We don’t publish egg-free recipes, so I can’t say for sure!
They look so fascinating, thank you very much!
This dough was perfect – easy to roll out and cut, and the cookies had the exact same shape coming out of the oven as they did going in. And most importantly the cookies were delicious 🙂 I also froze some of the baked cookies to bring out a few weeks later and they defrosted beautifully, you’d never know!
This was part of my Day 6 of my Bakemas series ( see here – https://www.instagram.com/dianaaozzanyan/?hl=en ). It has now become a go-to for my husband to ask me to make them even without the icing. Also very soft and buttery.
I have loved watching your Bakemas series! Thanks so much for the kind comment, Diana!
Simply the best sugar cut cookie recipe❤️✔️
My go to sugar cookie! Never fails! Super easy and they never spread. Just follow the directions
I’m so glad these cookies are a staple for you! Hooray!
Made these tonight! I love how it makes a big batch. The almond extract gives it great flavor. A great sturdy dough.
So happy you tried these cookies out, Sue!
I have never liked sugar cookies until I tried this recipe. I would always cook them too long or not enough which made me hate them! lol You definitely give amazing tips and tricks for perfect recipes! The cooking time is perfect.
Are the ratios for the frosting correct? Just tried and it is definitely not right.
She writes that you may need more powdered sugar. I did need to add a little more for a thicker consistency. Also, make sure your cookies are cooled before adding the frosting or else it’ll drip everywhere.
Where did you get the cookie cutters? I love the simple lines. Thank you
I used this recipe last year and it was the recipe I have always been yearning for!! Thank you Tessa for all the wonderful recipes and tips!! I’m about to make a batch right now!! 🙂
What kind of sprinkles did you use for the round ones that look like ornaments?
Hi Tessa,
Will this recipe work with Norwick metal cookie stamps? Thank you so much for your blog and videos
Margaret
Thanks! I’m excited to give it a try!
Before I chill the dough in the refrigerator, should I wrap the dough in plastic wrap?
Also where should I let the icing on the cookies dry for 24 hours? Just on the counter? Won’t the cookies dry out?
Yes, and nope! They don’t dry out 🙂
We baked and iced these cookies today, followed your ingredients and directions to the letter and the cookies turned out great! Soft, chewy, and filled with a subtle yet delicious flavour. These will forever be our go-to sugar cookies! Thanks so much for sharing. 🙂
These are the best sugar cookies ever! The proportions of flour, sugar and butter work out to taste the best, are easiest to work with and bake up better than any other recipe I’ve used!! (Can’t say enough, really!!) And, I’m so appreciate of the tip to roll between parchment paper, chill, and then cut out; no more roll-out mess! While they are chilling I can prepare the icing(s)…then it’s just bake, cool, ice! I bake a lot of cookies during the holidays – these are now my new standard Christmas cookie. THANKS!!!
Yay, Elizabeth! This made me so happy. Thanks for the positive feedback!! xo
Okay, me again, the one hosting a cookie-decorating party. How far in advance can I make the icing prior to using it on the cookies? I don’t want it to harden before we’re ready to decorate (and then I want it to harden really fast!)
I am hosting a cookie decorating party in a week. We will only have a few hours to decorate before everyone heads home. What recommendations to you have for a “quick dry” icing?
I do not see link to signup for the kitchen aid professional mixer. Help!
The tips on cutting and icing the cookies are great!
My sister & daughter and I will be trying your recipe & tips tomorrow! Thanks!
Great recipe! Thank you!!
Thanks for the helpful hints on decorating sugar cookies. I wish I had watched it earlier but I definitely will have great cookies my next batch. Very informative!
Thank you for the video’s. They were a big help.
great dough tips, I seem to have trouble with cookie dough for some reason so I appreciate the professional advice!
Hi, I watched your video the other day and I printed out the recipe for these Easy Snowflake Sugar Cookies, and I noticed in your video you say to use 1/4tsp. of almond extract but the written recipe calls for 1/2tsp. almond extract and in the video you say to use 1/2tsp. of baking powder but the written recipe calls for 1tsp. of baking powder. Could you please let me know which measurements are correct for this recipe because I would really like to make these cookies with the right measurements. Someone else had written about this same problem, but that comment is no longer listed.
Can you freeze these cookies once they are baked and decorated?
I love this recipe – very easy to make, cookies always turn out great & they taste fabulous! I always get tons of compliments when I share them!
Thank you, Tessa! This cookie dough is addictively delicious and also super easy to work with.
Happy holidays!
Can not wait to decorate. All the cookies are baked. Thanks for sharing!!!!
Tessa, should these have salt in them?
I prefer them without salt! But if you want to add salt, a 1/4 teaspoon fine salt should work.
Hi Tessa,
I’m loving your super simple recipes and fun videos. You mention that the icing can be made in advance. I’m thinking of mixing different colors and using squeeze bottles. How do you recommend storing these?
Thanks so much. Sophia
I don’t know if I did something wrong with this, but after rolling the dough with the parchment paper, I could not get the dough off the parchment without it sticking.
Pop it in the freezer for 15 minutes. It should peel right off 🙂
this is awesome ,two my granddaughter are coming on Sunday maybe this is what we can do together , decorate Christmas cookies blessings an many thanks
I love this Christmas cookies video and I will make these cookies with my grand daughters. I need mixer.
I love these recipes and use all the time but I do by hand mixing.
article very helpful at all, I personally really like, for that I can only say thank you for sharing and hopefully more successful in the future
Saludos y gracias por compartir tus recetas
Si seco las galletas ya cubiertas de royal icing en el deshidratador( dehydrator), cambia la consistencia de la galleta?
las he sentido un poco mas duras, es normal?
Gracias
An I half the ingredients? X