This post may contain affiliate links. Read our disclosure policy.
This Homemade Hawaiian Roll recipe was a true labor of love to get just right. The store-bought ones have quite a few ingredients not available in the home kitchen so it took a LOT of testing.
At first, the rolls weren’t fluffy enough. So we made a bunch of tweaks to get the texture to match the store-bought kind. Then they weren’t sweet enough. 15 batches later (yes, 15!), we finally nailed it.
Honestly, it took over a year to get this copycat recipe perfected. Luckily, we didn’t mind testing these rolls so many times because they’re THAT good.
These Homemade Hawaiian Rolls are so versatile. They’re perfect as a side with dinner or as the main course (think ham and cheese sliders!). Take them as a side to a barbecue. Make little sandwiches with turkey and leftovers after Thanksgiving. The options are endless!
And bonus: the scent that will waft through your house as these bake is utterly intoxicating.
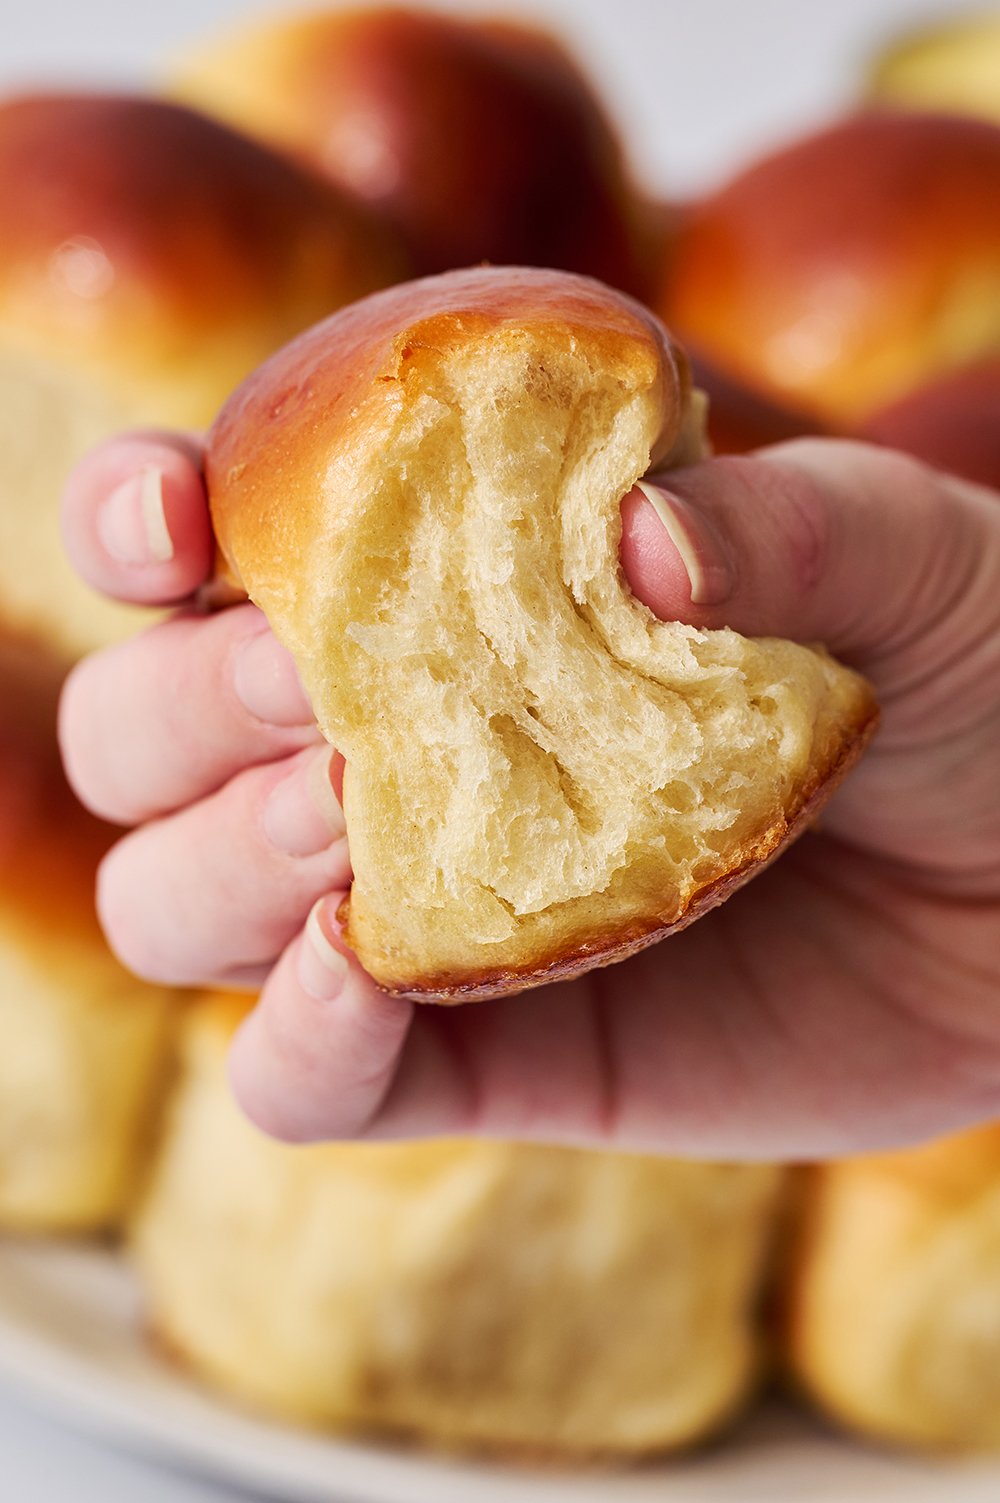
These Hawaiian Rolls are so much better than the prepackaged versions. You’ll never want to buy store-bought again after trying these!
If working with yeast feels a little intimidating, don’t fret. I’ve included a ton of tips and tricks below so even newbie bread bakers can nail this recipe.
How to Make Homemade Hawaiian Bread Rolls
What Are Hawaiian Rolls?
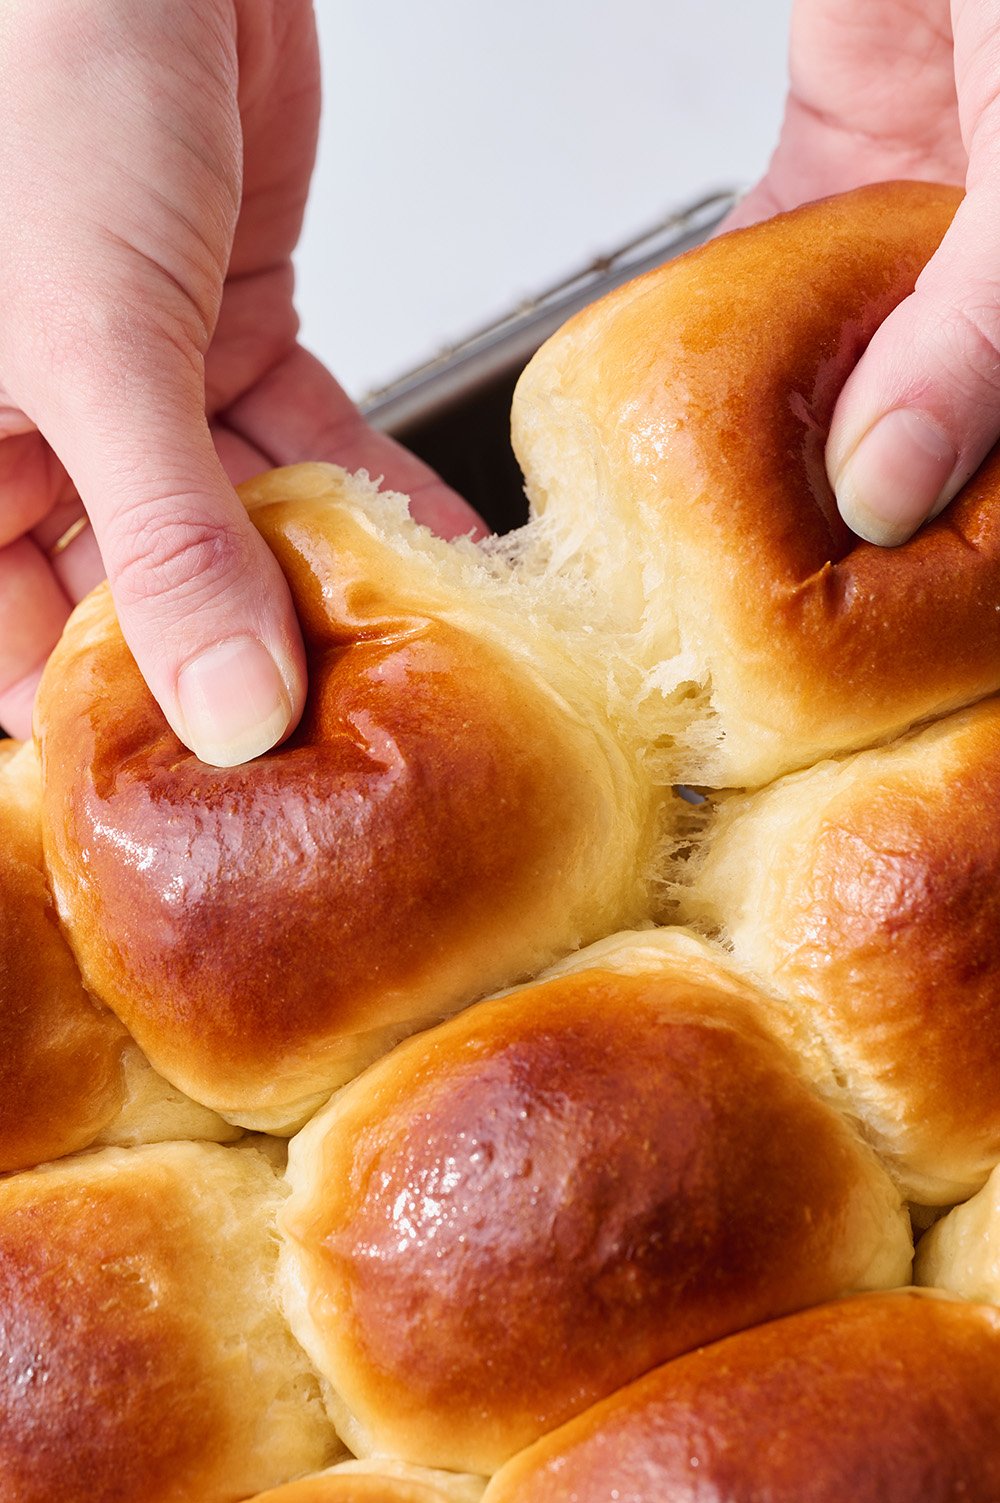
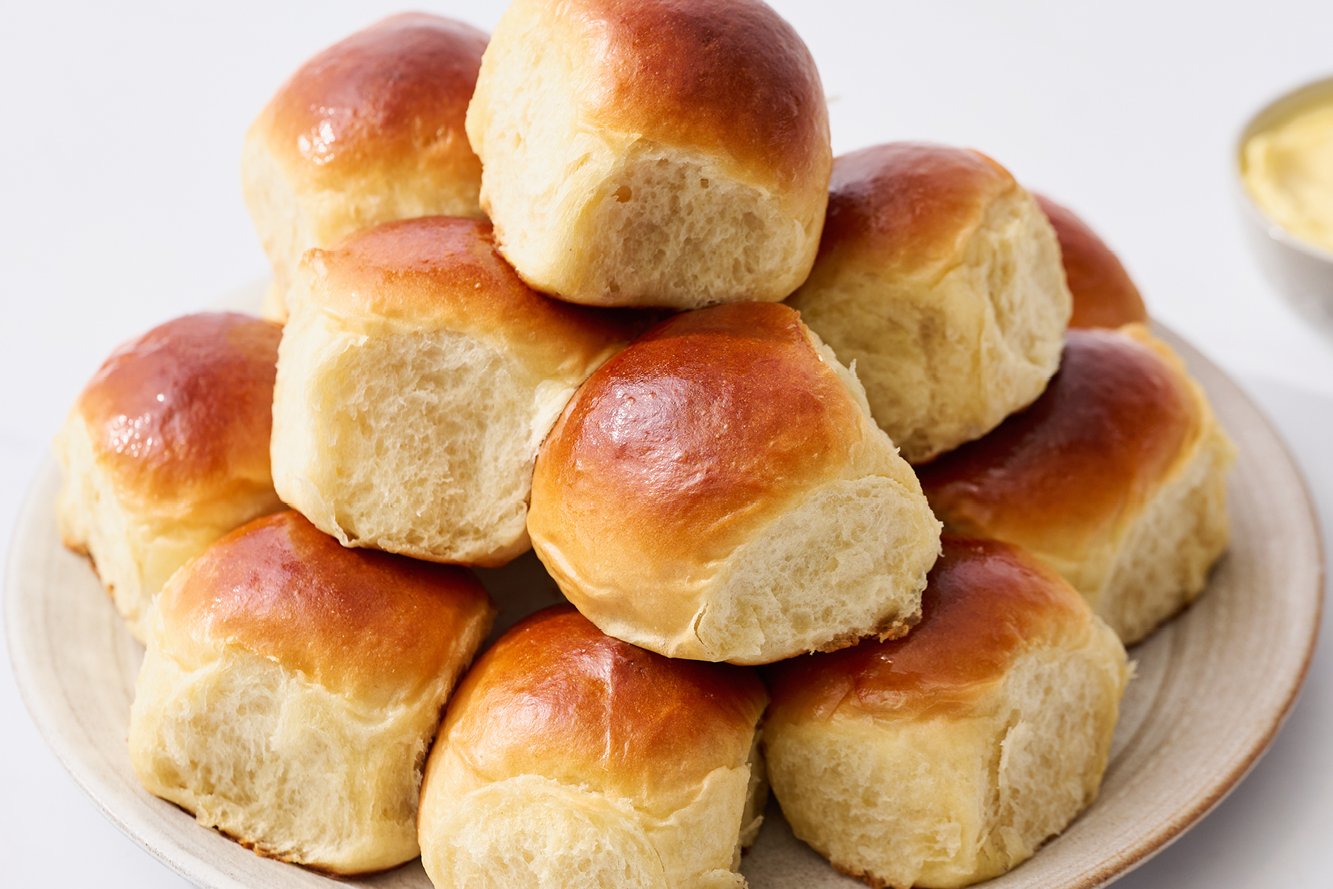
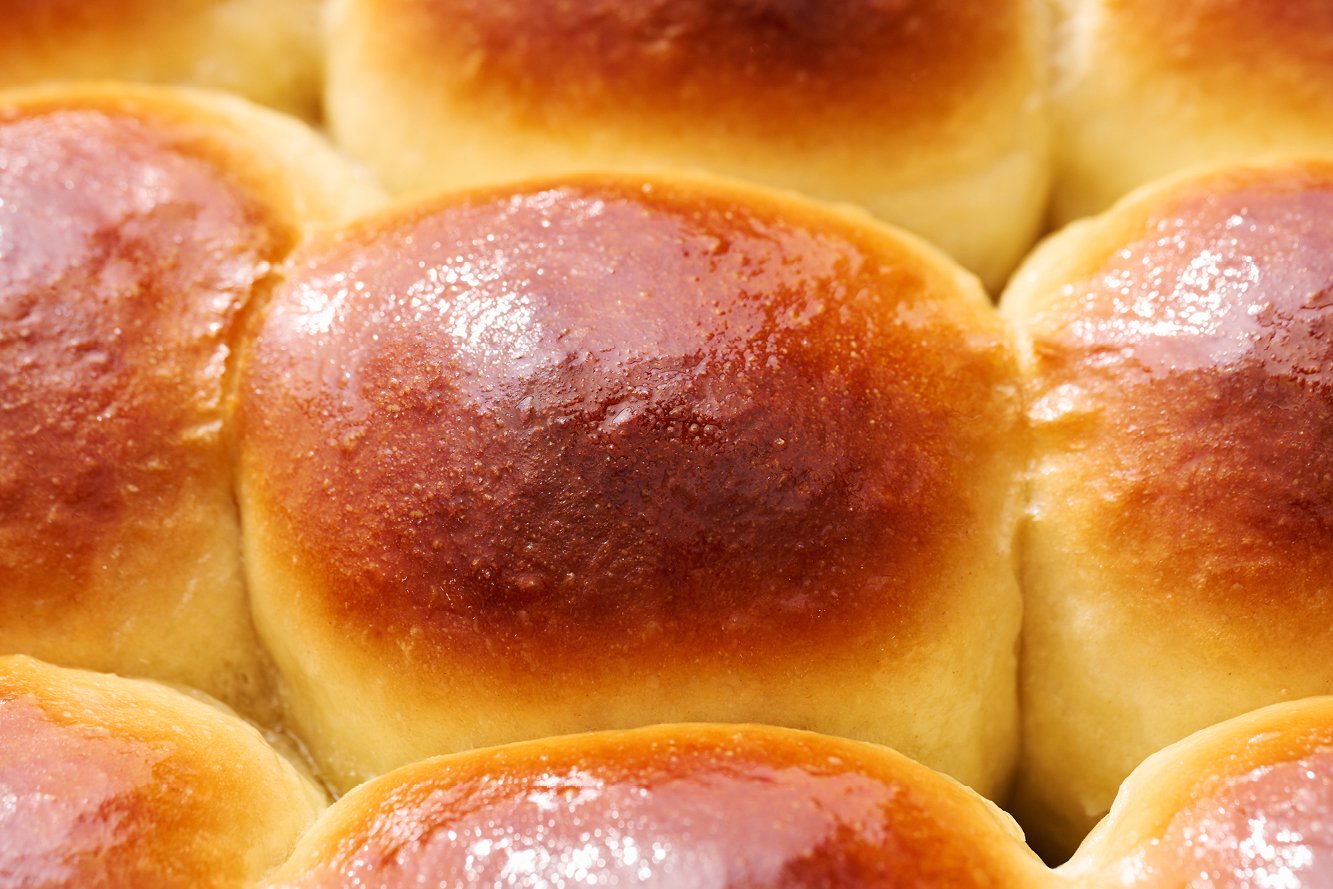
You may have seen Hawaiian Rolls at your local supermarket – but these homemade versions are SO much better! Hawaiian Rolls are distinctly sweet and ridiculously soft and light, perfect for making delicious mini sandwiches, breakfast sandwiches, sliders, and more. Your kids will go crazy for these rolls, too!
Can I Make Homemade Hawaiian Rolls Without a Mixer?
Probably… but it won’t be easy! Your KitchenAid stand mixer does all the hard work in kneading these Homemade Hawaiian Rolls. By hand, it’s going to take a lot of elbow grease, a long time, and give your arms and hands a heck of a workout. Learn more about kneading dough by hand here.
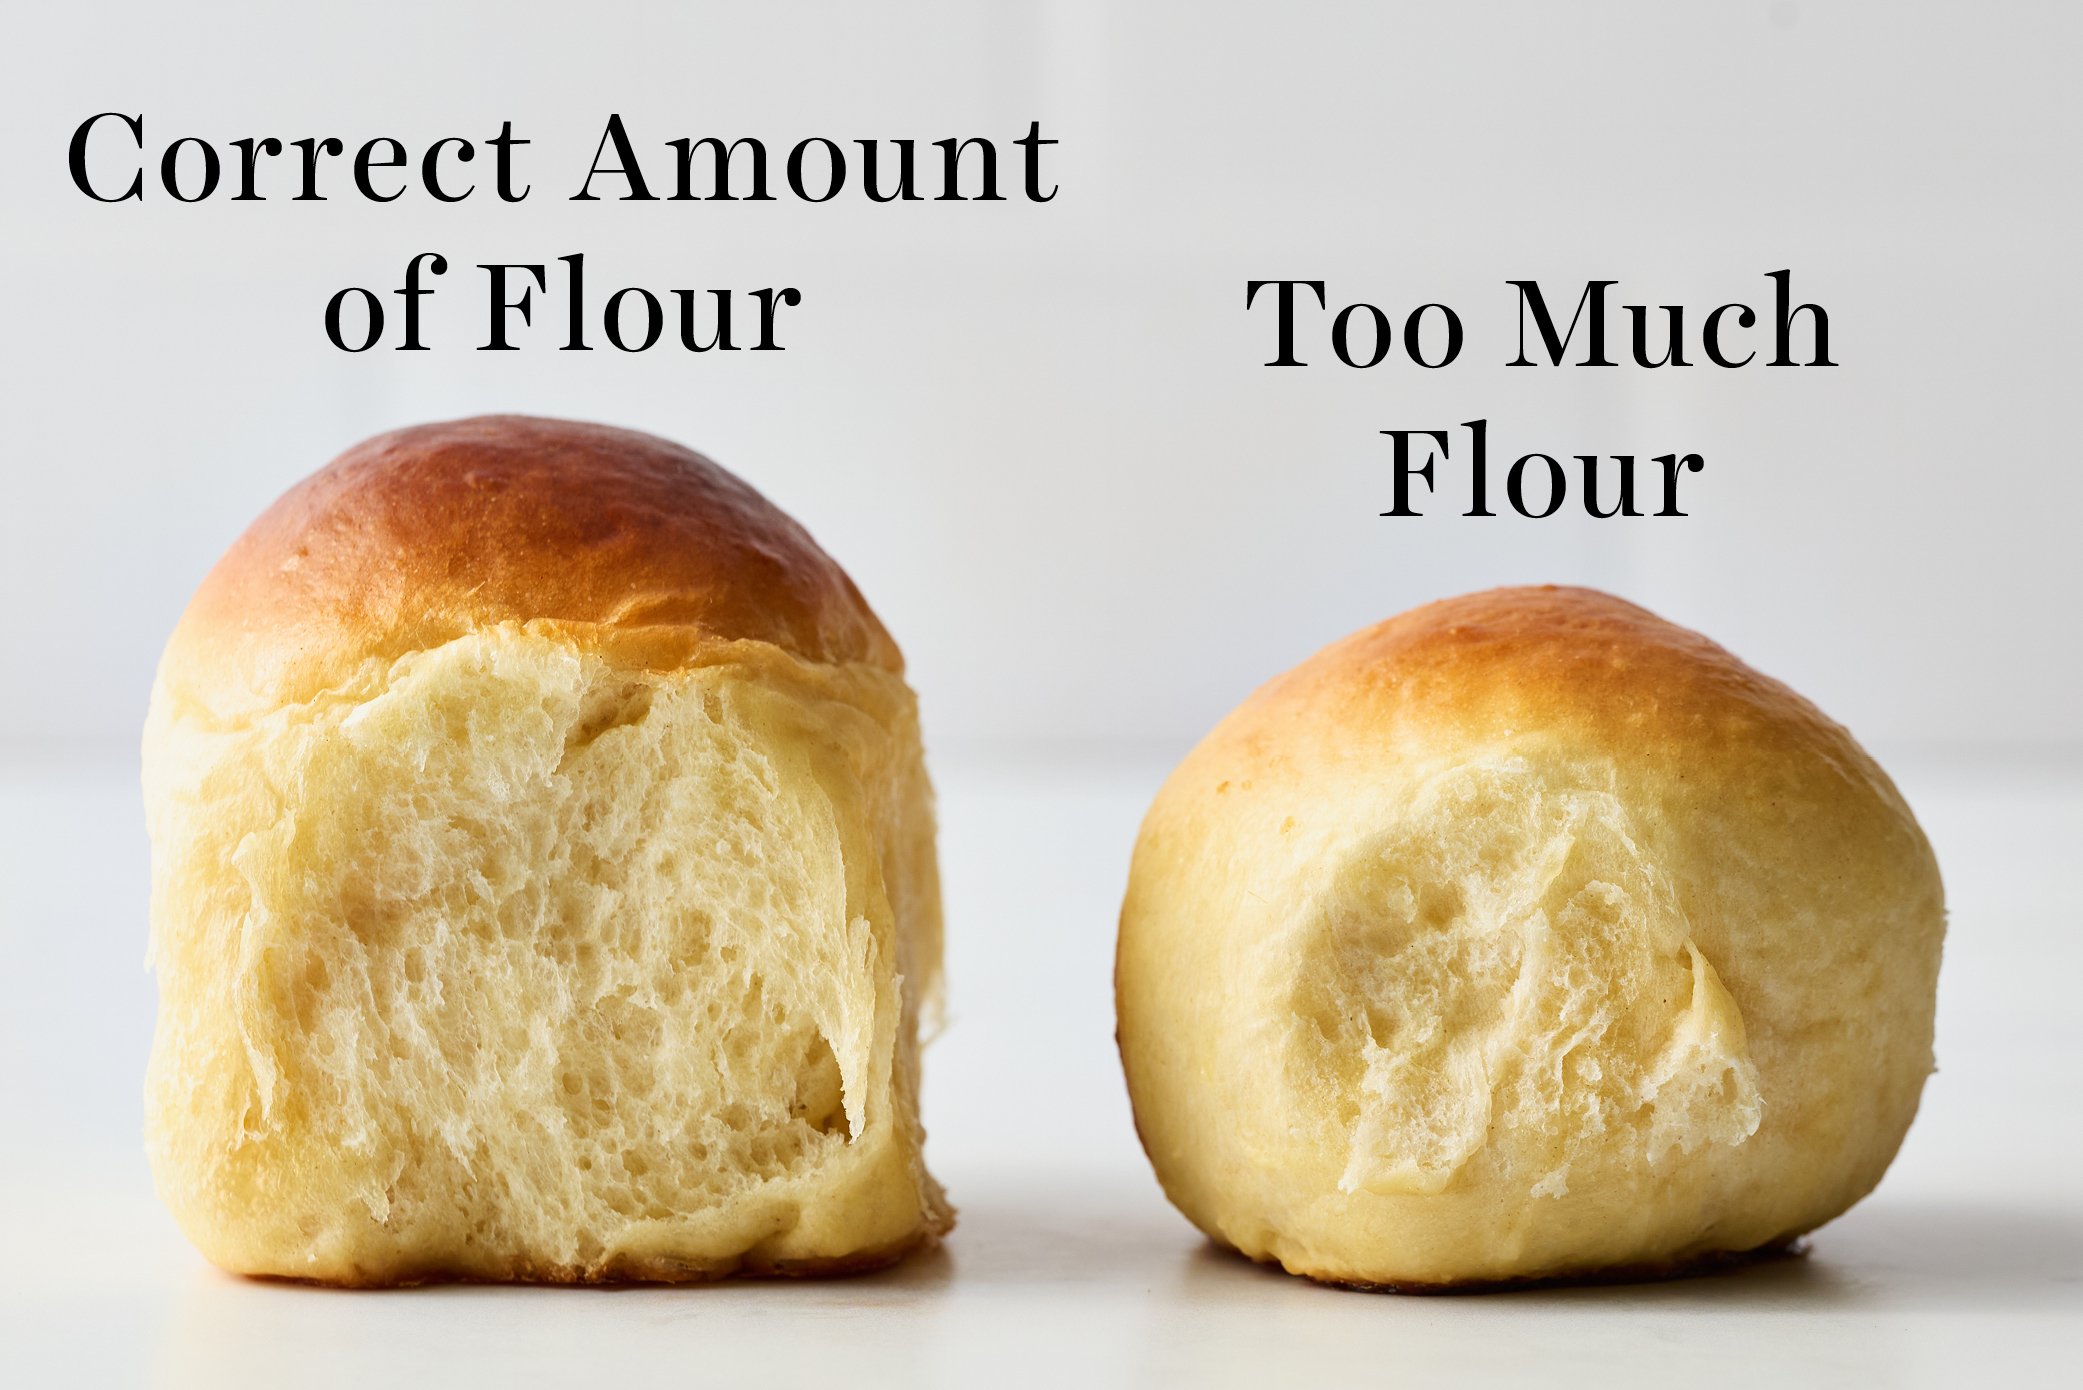
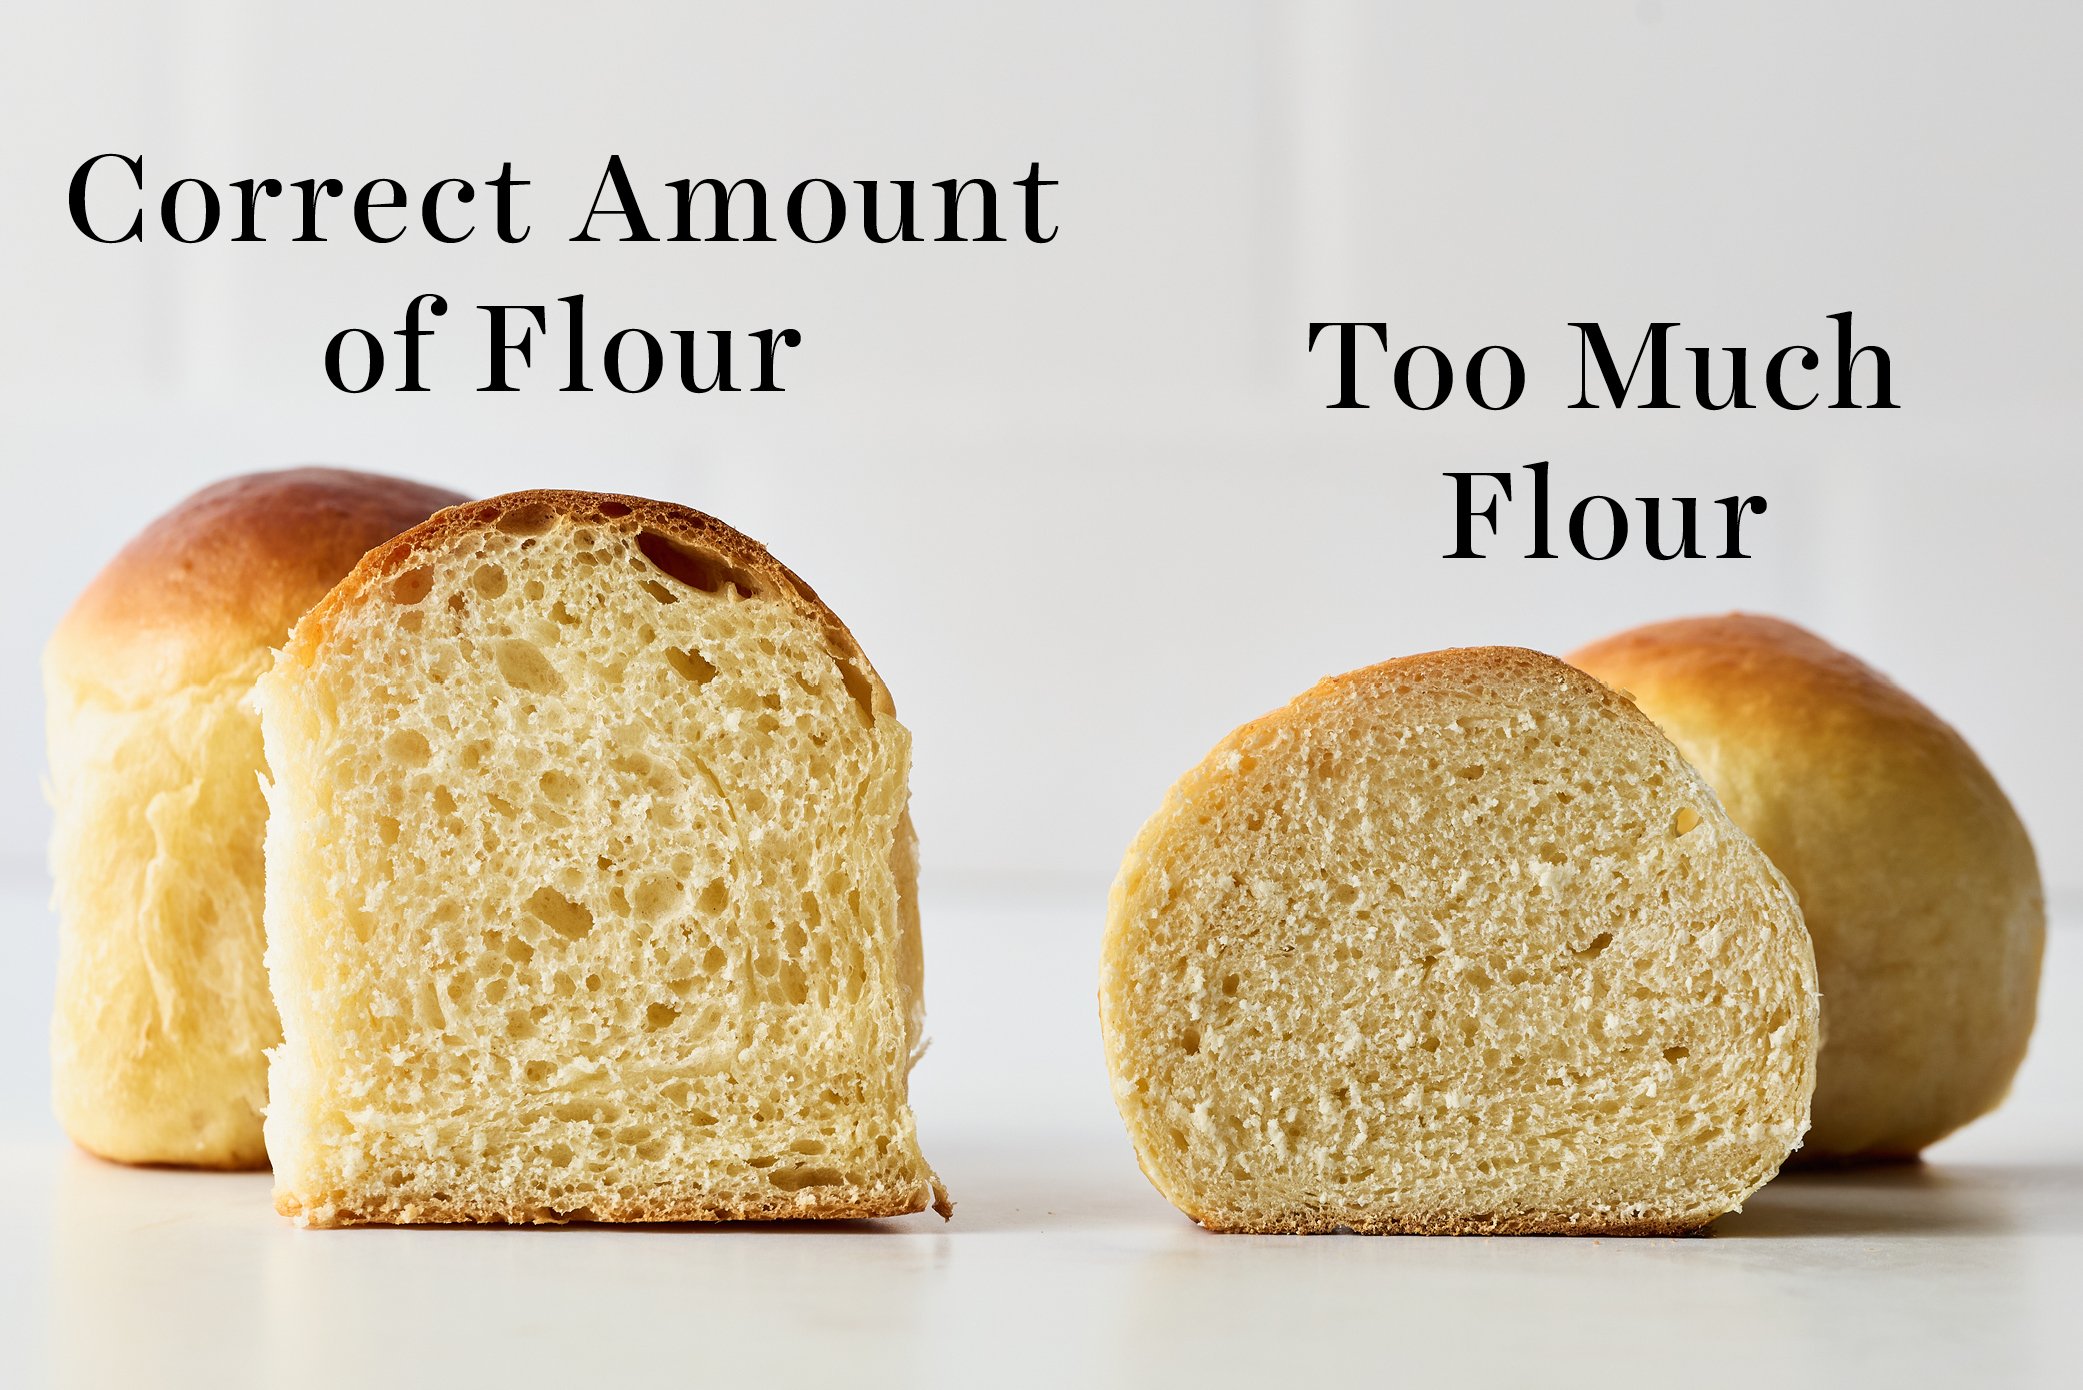
How To Make FLUFFY Hawaiian Rolls:
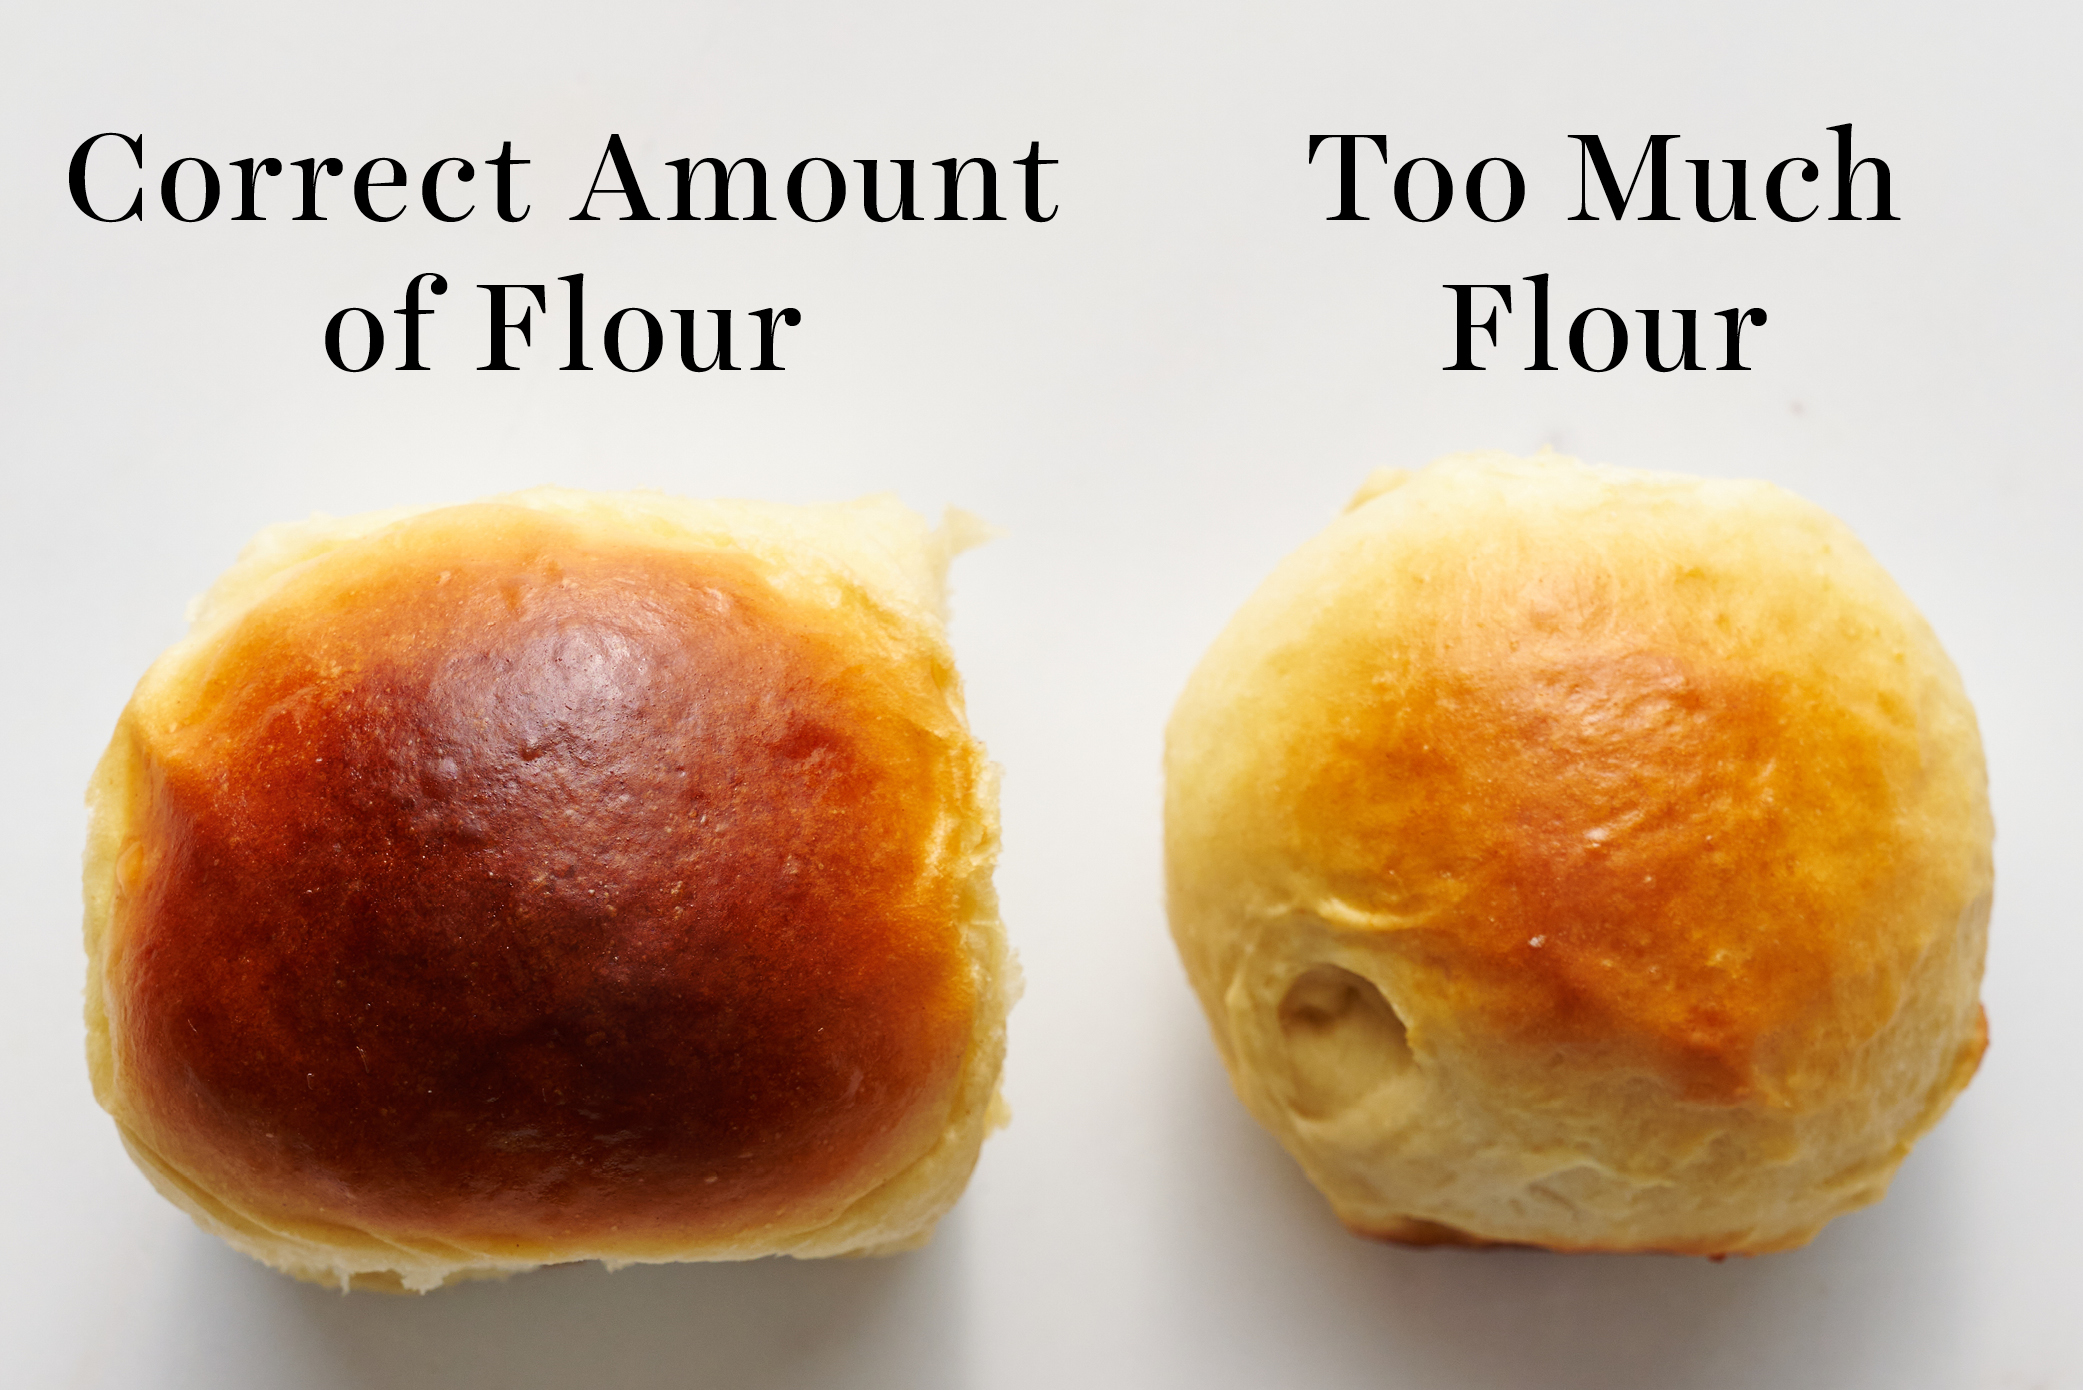
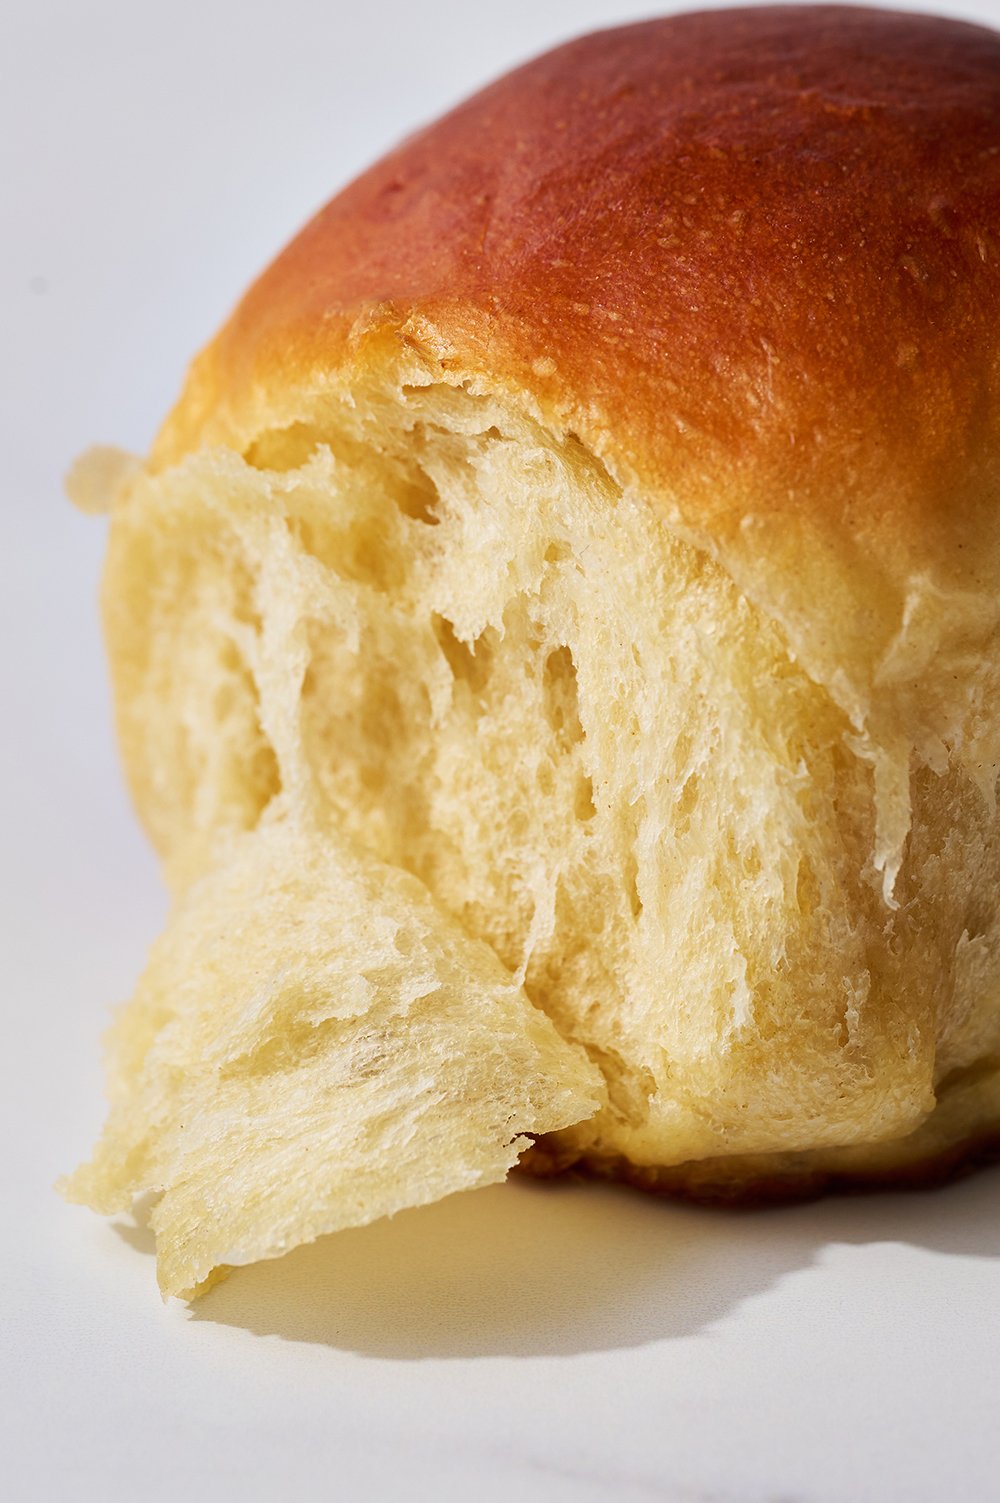
- Avoid adding too much extra flour to the dough. Since this dough is slightly sticky and enriched with milk, butter, and a lot of sugar, it takes quite a while to come together. These ingredients slow down gluten development. Your instinct might be to add extra flour; however, any extra flour will create a denser, tougher bun instead of the light, fluffy, brioche-style bun we want.
- Know your kitchen climate. This recipe was tested in Arizona, Michigan, and New York. During testing, Emily from Team HTH’s kitchen (in Michigan) was about 87% humidity, Kiersten from Team HTH’s kitchen (in New York) was about 65%, whereas our studio kitchen in Arizona was 14% humidity. The more humid your location, the stickier your dough will be. If your kitchen is about 65% humidity or higher, use the higher range of bread flour listed (4 1/2 cups, or 540 grams). Reduce the bread flour if your kitchen is less than 65% humidity. Begin with the lower range listed (4 cups + 1 tablespoon, or 516 grams) and add additional flour by the tablespoon (8 grams) as needed.
- It’s better to be slightly sticky than dense. This dough shouldn’t be unbearably sticky, but it will be tacky. Resist the urge to add extra flour as this will negatively impact the texture of the rolls. The dough will be easier to work with after the first rise!
Proofing Homemade Hawaiian Rolls Sliders:
- This dough will take some time to proof, especially if your kitchen is cold. The sugars, pineapple juice, eggs, and butter in this recipe add deliciousness but also slow the proofing process.
- The first rise will take about 90 minutes and the second rise will take about 1 hour; however, these times are completely influenced by the temperature of the rising environment.
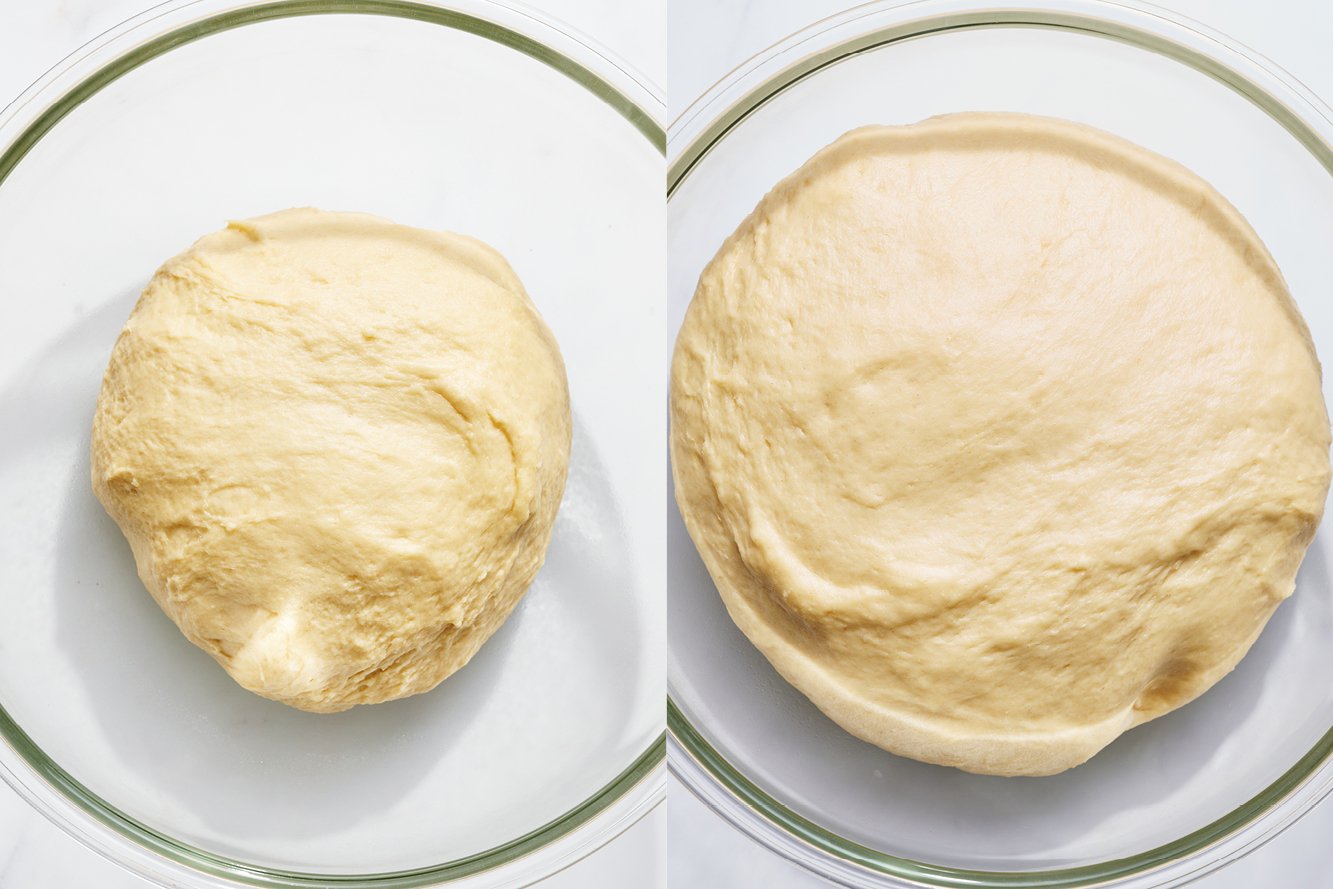
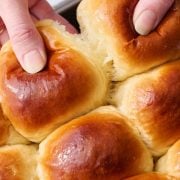
- You can tell if your bread is well-proofed by giving it a gentle poke with your finger or knuckle. Bread dough that has proofed well will spring back slowly when poked and leave an indent. If it snaps back too quickly, it needs more time.
- Don’t be tempted to speed up the rise time too drastically, as too much heat will kill the yeast and reduce flavor development.
- If you’re lucky enough to have a proofing setting on your oven, you can use that (provided you’ve tested it previously and it doesn’t get too hot!).
- If your kitchen is very cold, turn your oven on and place the bowl nearby, so it gets a little indirect warmth. If your kitchen is very hot, watch the rolls very carefully, as your rise time might be much shorter than specified.
How To Tell If You Have Over-Proofed Your Homemade Hawaiian Rolls
This can happen easily if your kitchen is very hot, or if you’re super busy and forget to check on the rolls. If your rolls have over-proofed, they will likely deflate while egg washing, or look deflated once baking. Over-proofed rolls will look a little sad, but they should still taste fine.
How to Shape Hawaiian Bread Rolls
It’s important to properly shape your bread rolls for beautiful, tall, fluffy rolls.
- Once the dough is risen, press it down to deflate it slightly.
- Place the dough onto a clean surface (not a floured surface). Use a bench scraper to section the dough into 12 equal pieces. Don’t worry if they’re not perfectly equal in size. However, if you’re a perfectionist you can actually weigh the entire mass of dough, divide that number by 12, then portion each piece perfectly by weight.
- As you’re shaping each piece into a round, make sure to pinch the dough into one central point to create a tight ball. This will help the rolls rise beautifully. Don’t flour your work surface when shaping the rolls because you want some resistance to roll them into taut balls.
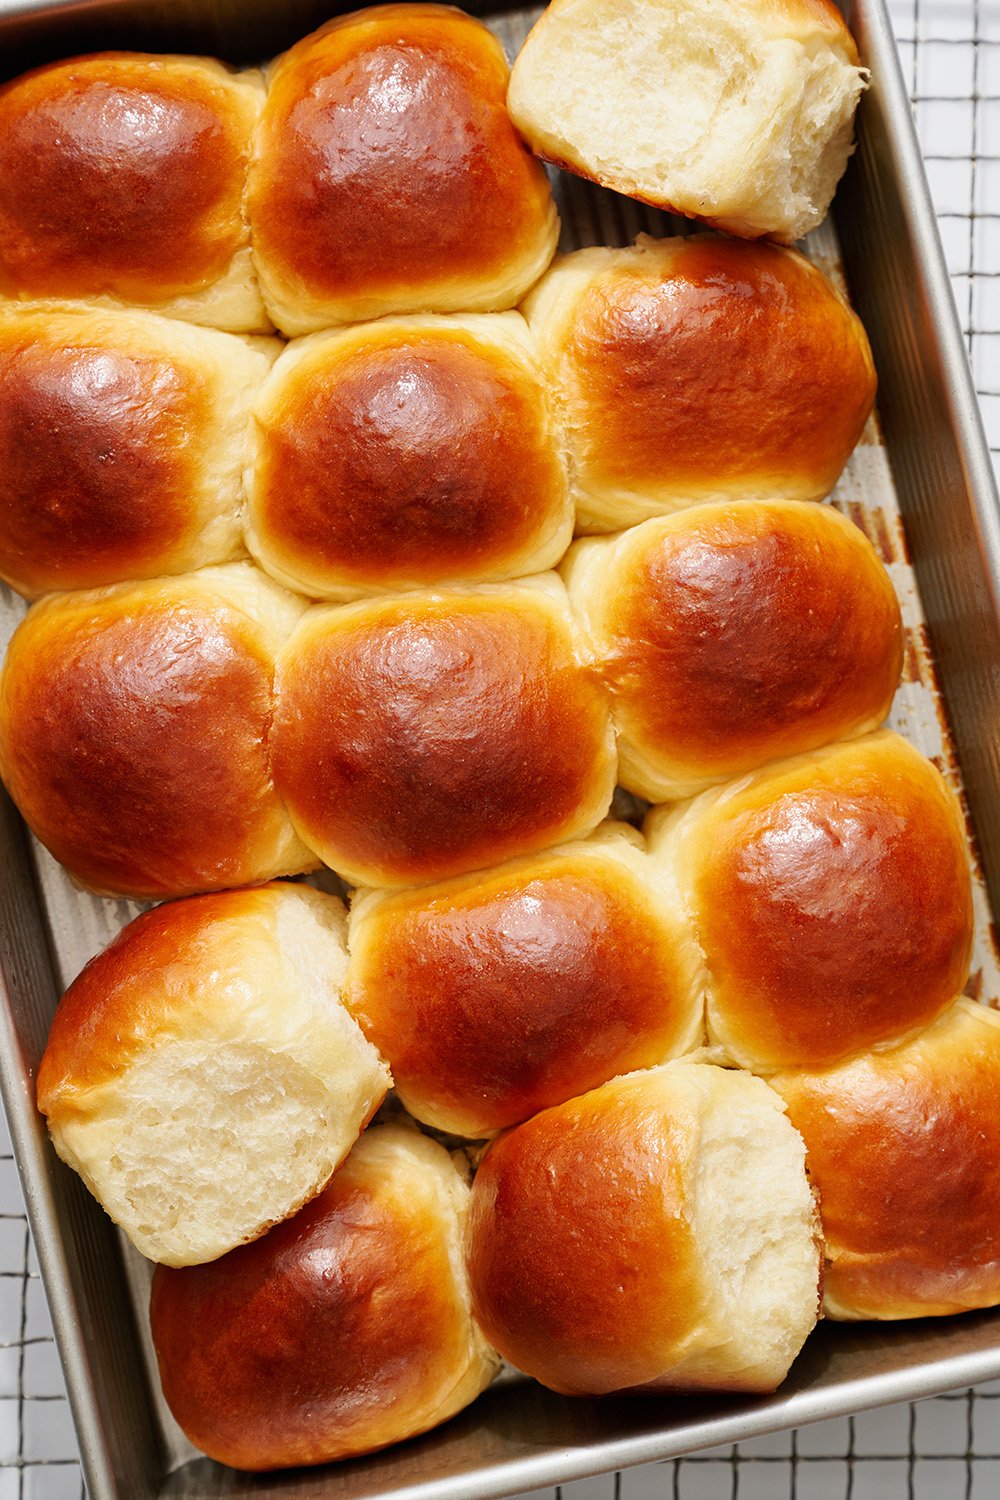
The Best Pan for Homemade Hawaiian Rolls
- This is my favorite pan for baking Homemade Hawaiian slider rolls, but any light-colored metal pan will work just fine.
- Avoid dark-colored metal pans, as these can cause excessive browning and dry out the edges.
- If using a glass or ceramic baking pan, you may need to extend the baking time. Learn more about baking in Glass vs. Metal Pans here.
For Those Who Prefer Not-So-Sweet Rolls
These rolls are subtly sweet, but please don’t experiment with reducing the sugar (we’ve tested it!), it’s an essential part of this copycat Hawaiian Roll recipe. The texture will dramatically worsen with a reduction in the sugar. Learn more about sugar’s role in baking here. If you prefer a less sweet roll, try my Ultimate Dinner Rolls recipe instead.
Do I Have to Use Bread Flour For These Hawaiian Rolls? Can I Use Just All-Purpose Flour Instead?
For best results, I firmly recommend sticking with both bread and all-purpose flour as written. Here’s why:
- Bread flour contains a higher percentage of protein than all-purpose flour, which helps build gluten and will aid in giving the rolls structure, height, and a little chewiness. Gluten is the backbone of any bread’s structure and since we are adding ingredients that prohibit gluten development (pineapple juice, butter, egg, sugar), that additional protein is needed to develop structure.
- When I tested a batch of Homemade Hawaiian Rolls using only all-purpose flour, the rolls were way too dense, noticeably drier, and took significantly longer to knead and rise.
- I also found that making the rolls with only bread flour yielded rolls that were too firm. The addition of a little all-purpose flour balances this out, making the rolls softer.
If you absolutely must use only all-purpose flour, just note that they’ll take much longer to knead, longer to proof, and they won’t be as soft and fluffy.
How Long Do Homemade Hawaiian Rolls Last?
These Homemade Hawaiian Rolls will keep for 3 days in an airtight container, stored at room temperature. Don’t refrigerate these Hawaiian Rolls, as it will dry them out faster. Refresh in a 300°F oven for 5 minutes, or pop in the microwave for 15-20 seconds, or until warm, before serving.
Can I Make Homemade Hawaiian Rolls Ahead of Time?
Enriched yeast doughs can have issues rising properly if made ahead. Instead, I recommend freezing the fully baked rolls as directed just below.
How to Freeze Hawaiian Rolls:
- Once cooled, place rolls in a ziptop bag or airtight container and freeze for up to 3 months.
- To thaw, leave at room temperature for a few hours.
- Reheat in a 400°F oven for 5-10 minutes, or pop in the microwave for 15-20 seconds, until warmed through, if desired.
More Bread Recipes You’ll Love:
More Sides You’ll Love:
Intimidated by bread baking? Download my *free* Beginner’s Quick Guide to Bread here.
-
½
cup
(116 grams) canned pineapple juice,
at room temperature
-
½
cup
(116 grams) whole milk,
warmed, (100-110°F)
-
5
tablespoons
(71 grams) unsalted butter,
melted and slightly cooled to just warm (~85°F)
-
6
tablespoons
(75 grams) granulated sugar
-
2
tablespoons
(25 grams) light brown sugar
-
2
eggs,
at room temperature
-
1
teaspoon
vanilla extract
-
2 ¼
teaspoons
(1 packet) instant yeast1
-
4
cups + 1 tablespoon
(516 grams) - 4 1/4 cups (540 grams) bread flour2,
dependent on kitchen climate, see notes
-
¼
cup
(32 grams) all-purpose flour
-
1 ½
teaspoons
fine salt
For egg wash & finishing:
-
1
egg,
lightly beaten
-
2
tablespoons
water
-
1
tablespoon
(14 grams) salted butter,
melted
-
Combine the pineapple juice, milk, melted butter, sugars, 2 eggs, vanilla, and yeast in the bowl of a stand mixer. Add the all-purpose flour, plus 2 cups (286 grams) of the bread flour, and stir with a wooden spoon until the dough forms a rough, shaggy mass. Stir in the salt. Attach the dough hook to the mixer and turn to medium-low speed. Gradually add the remaining flour JUST until the dough comes together. You may only need some of the flour, depending on your kitchen environment and brand of flour. Continue kneading on medium-high speed for 4 to 5 minutes, until a soft and smooth ball of dough forms.
-
Lightly grease or wet your hands and place the dough in a lightly greased medium-sized bowl. Cover with plastic wrap. Let rise until puffy and doubled in size, about 1 ½ hours3.
-
Spray a 9x13-inch metal baking pan with cooking spray. Gently deflate the dough. Use a bench scraper or knife to divide the dough into 15 equal pieces. Shape each piece into a ball and place in the prepared pan.
-
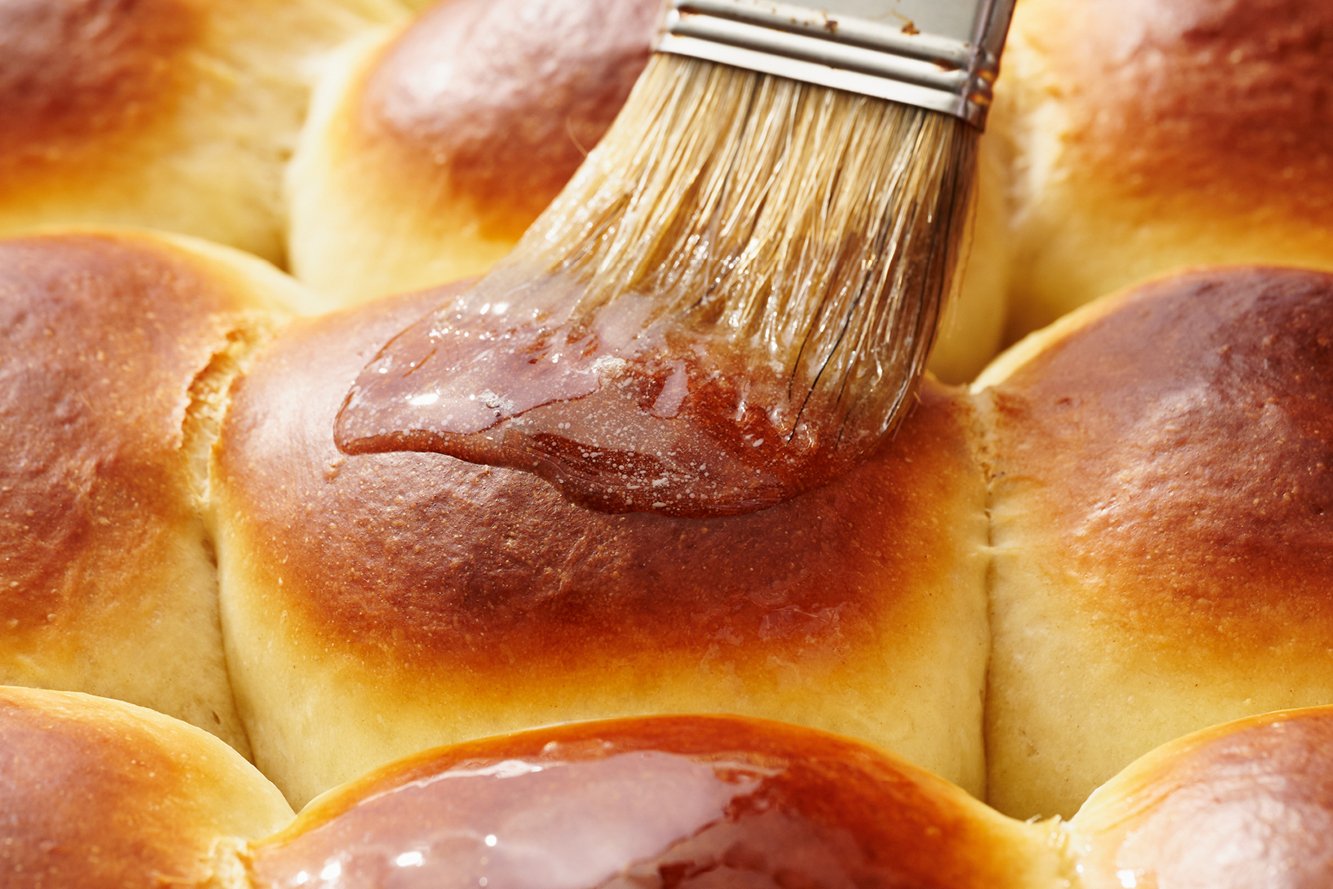
In a small bowl, combine the remaining egg with 2 tablespoons of water. Brush all over the rolls. Cover with plastic wrap and let rise again until doubled in size, about 1 hour**.
-
Meanwhile, preheat the oven to 375°F.
-
Bake the rolls for 20 minutes, or until golden brown. Brush with melted butter. Serve warm. Store leftovers in an airtight container for up to 3 days.
1. If you don’t have or can’t find instant yeast, you can easily use active dry yeast instead. Add it right in with the dry ingredients like instant yeast, just know the dough will take about 20% more time to rise. Or, to speed up that rise time slightly, simply combine it with the warm milk called for in the recipe and allow it to proof for 5 minutes before adding into the bowl with the other ingredients.
2. The more humid your location, the stickier your dough will be. If your kitchen is about 65% humidity or higher, use the higher range of bread flour (4 1/2 cups, or 540 grams). Reduce the bread flour if your kitchen is less than 65% humidity. Begin with the lower range listed in the recipe (4 cups + 1 tablespoon, or 516 grams) and add additional flour by the tablespoon (8 grams) as needed.
3. Rise time may vary depending on kitchen environment and climate.
This post was originally published in 2014 and has been updated with additional tips, recipe improvements, and new photos. Photos by Joanie Simon.


I ended up needing to use about 5 cups of flour to get it to be dough but that could be because my homegrown eggs were kind of large. Other than that these came out delicious, fluffy and tasted just like the real thing only fresher and better! These will be on the menu for the holidays this year, thank you so much for a terrific and easy recipe!
I made these for dinner tonight, they are AMAZING!! So soft & fluffy, just a hint of sweetness! Major hit with everyone in my family, including my pickiest eater!!
would I be able to make this unto a loaf? would the rising and baking times change?
Hi Jordan! Unfortunately, we haven’t tried that, so we can’t say for sure. Let us know how it goes if you give that a try 🙂
I have made these rolls many times and they are great! With that said my husband requested that I make a loaf yesterday. I put the dough into a 9×5 pan and baked at 350 for 40 min. I did have to tent the loaf with aluminum foil the last 10 min. to keep the the top from browning too much and I did not use the egg wash for the top. It turned out very good.
This recipe is wonderful! Made it exactly as written and made hamburger buns instead of rolls. Perfection! Thank you for sharing!
Thrilled you enjoyed them, Sondra! Thanks for the comment!
hi, am I able to make this recipe then store it in the fridge to proof, and bake the following day?
Hi Aurora! Yes, Tessa has included instructions for this above the recipe 🙂 Let us know what you think once you’ve given these rolls a try!
I’ve made this recipe several times and it is perfect. The only think I did was to make 12 rolls insteal of 15 because my family wanted a little larger roll in the slider. Thanks so much for a great recipe.
I hope you don’t mind but I had a happy accident with these and modified the recipe slightly to make some to die for pretzel nuggets… The first time I made the rolls they came out closer to a pretzel roll than a dinner type roll… my own fault but I’ve since with the modifications been making the nuggets regularly and everyone loves them. Paired with a buttercream frosting dip I can’t make enough! The sweet and tangy flavor from the pineapple juice paired with the frosting just makes them impossible to resist.
Hi Paul! That sounds like a fun modification! Glad you’re enjoying it 🙂
Hi can I use the bread machine?
Hi Mary! We haven’t tried using a bread machine, but other readers have with success and left how they use it in the comments 🙂 Let us know what you think when you give this recipe a try!
I made this recipe today and the rolls turn out amazing!
Definitely I will make them again, and again……..
My question is: in case I don’t have pineapple juice at home, what I can substitute the pineapple juice with?
Hi Dorota! I’m sorry, we have not tried these rolls with anything other than pineapple juice, so I cannot say for sure! I’m glad you enjoyed what you made today! 🙂
I have made this recipe twice now. The buns good, but there is a problem with the recipe. Salt should not be added until the yeast has proofed. Adding salt before will kill yeast and dough will not raise properly. Followed recipe first time. After 5 hours dough still had not raised. I don’t live in a high altitude area and I put dough in warm area of kitchen. This second time, I didn’t add salt until yeast had proofed and dough raised just fine. I will be making these again, just adding salt later.
Hi Jean! Thanks for the feedback! Tessa has actually discussed this matter with Red Star Yeast directly, and they let her know that the way their yeast is manufactured, it is able to withstand many more conditions than it once could. Basically, as long as the salt is added to the yeast alongside other ingredients (i.e. not just directly), the salt should not inhibit the yeast’s rising abilities. That being said, perhaps other yeast manufacturers’ yeasts do not have the same stability. We will be taking your feedback into account and editing the recipe with clearer instructions. Thank you again for your feedback here!
Hi!!
Made these hawaiian buns yesterday and it came out fantastic…..my daughter loves it!!
Just some points based on my execution of this recipe:
1) The pineapple taste is not apparent…just a mild sweet taste….was hoping for a bit of pineapple flavour
2) I did use bread flour and the texture was nice and fluffy….added a little more water to bring the dough together since i did knead by hand.
3) the dough was a bit tough and didnt poof as much as other bread recipes i have tried so i was a little concerned but it came out perfect…so be warned! It also took longer to poof in both instances but was well worth it!
4) i did replace half cup of the flour with some whole wheat and the buns were still soft and delicious
Give it a try!! You might be pleasantly surprised
Hi Ray! So happy you enjoyed these rolls!! Thanks for sharing your findings and tips, too! Bread is a strange beast sometimes – it can rise so differently for everyone, or even differently for the same person two days in a row. It all depends on the environment in your kitchen at the time, and how warm and humid it is. I’m glad they came out well and you found them delicious! 🙂
can I sub pineapple juice for milk to make them little sweeter or is 1/2 c of juice sweet enough.
I am going to make this weekend.
tia. bags
Hi there! No, the milk is essential to this recipe, I wouldn’t suggest substituting pineapple juice instead. How did your rolls turn out?
Delicious
I a, not sure what I am doing wrong…did this recipe 3 times///this time I had a great feeling I did it, but they are still coming out dense..not as bad as previous, but dense. Flavor is there, but not fluffy at all. HELP!
Sorry you’re having issues with your rolls! The most important steps in creating light and fluffy rolls are to use a digital scale to measure your ingredients (or check out this article here on How to Measure Flour) and to ensure that your dough doubles in size for each rise time. I recommend taking photos of your dough before rising and after to compare as it’s hard to tell sometimes Please note that the amount of flour listed in the ingredients is approximate as Tessa notes in the directions you may not need as much depending on your kitchen environment or brand of flour. I hope that helps! Please give this recipe another try, and let us know how it goes!
I made two batches of these and they were so amazing! I didn’t have bread flour so I used all purpose flour and they turned out perfect. I gave some to my neighbors and they already asked for the recipe. I will definitely be making these again!
Wow, that’s awesome! So happy to hear they were such a hit, thanks for taking the time to comment and let us know 🙂
Hi, first of all, thank you for this recipe….its got my mouth watering! My son is a fanatic for the Hawiian Rolls! That’s why I’m on here trying to find a good recipe I can trick him with lol! If we can fool him with this recipe you are a culinary genious!!!
However, just for now….for me…I’m wondering if I can substitute lemon juice for the pinaple, or I do have several fresh Oranges that have nice flavor, also, I only have cake flour and all purpose flour so could I use either of those, or maybe mix them I’m? I realize I’m asking if I could really change up the recipe, if it didn’t work I wouldn’t blame you, I still plan on getting the correct ingredients as soon as I can…
I’m just wondering if I can substitute a few ingredients just to get an idea of the recipe…I’m just wanting to make this recipe so bad like right now,…. I only have a jar of “instant active dry” yeast will I need to use liquid from the recipe to proof the yeast or can I add extra liquid for the yeast?
Also,, once I do get to the store whenever that will be…..I’ve only seen large cans of pineapple juice, so I’m like the previous lady, what is the actual measurement of the pineapple juice that is used?
Sorry for asking for ideas on how to change up the recipe, I never do this…..I just don’t have a choice at the moment….
If you or anyone have any suggestions other than telling me not to make it lol I would appreciate the invite. Once I do make this recipe as it’s printed and my son has tried it, I will post it here for sure!!!! I can’t wait to make these correctly!
Hi Bobbi! We always recommend making the recipe as written as that is what has been tested extensively. Changing or substituting anything will produce different results. You’re welcome to experiment with it, but we do recommend that you make it as written first, just so you have something to compare your experiments to. You are able to use active dry yeast instead, please read through the recipe notes above the recipe for more details, including your question of flour. And as the recipe ingredient’s list states, this recipe uses 1/2 cup of canned pineapple juice. I hope that helps!
How much pineapple juice is half a can?
Hi Kimber! It’s 1/2 cup of canned pineapple juice, not half a can of pineapple juice 🙂 Hope that helps!
This is my go to recipe in making rolls and Kolaches!! Thank you!!
Jemma is way off base.
This was the best recipe I’ve made for these rolls. I did allow the second raise to take place over night in the fridge.
Most of the time these recipes end up too dense and heavy. ( hence the overnight raise this time)
I too have been cooking for some time. ( 52 years) I’m 57 my first attempt at cooking was fried bacon and eggs at age 5. I do not like to see cooks get bashed especially when its unwarranted. Thank you for sharing this recipe.
So happy you loved this recipe, Charles! Thanks for sharing as well as the kind words 🙂
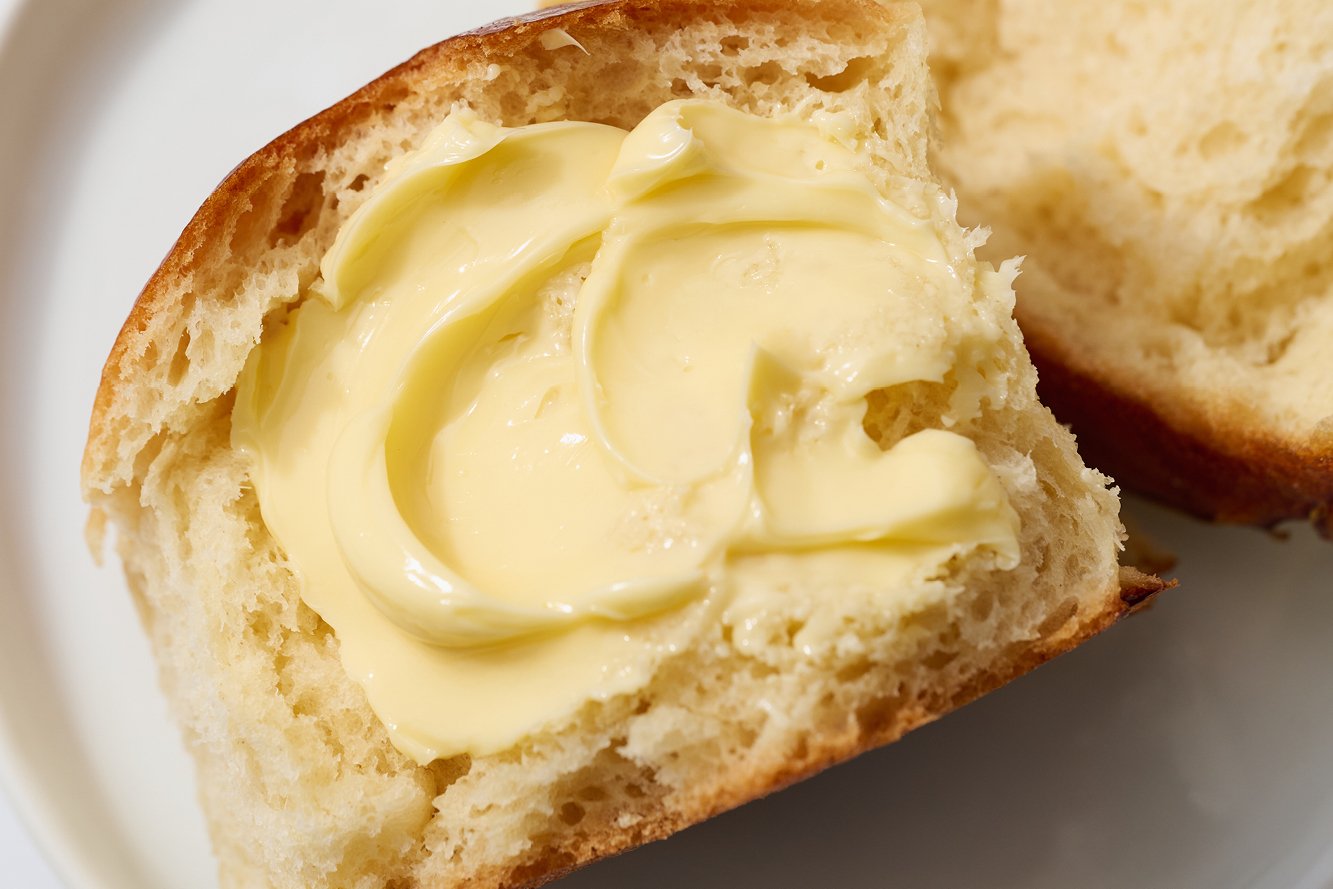
Even better than the name brand rolls! I have made these countless times since I found this recipe. The only thing I add is to run Kerrygold butter over the tops of the rolls once I take them out of them oven. I can’t recommend this recipe enough.
Nothing wrong with brushed butter on top, yum!! So happy to hear how much you love this recipe, thanks for sharing! 🙂
Okay, let me preface this with: I have 25 years of experience baking breads, with a considerable about of success. I love in very dry climate and that can sometimes make baking challenging. I know how to proof my yeast, what under and overdeveloped glutens look like, and proper temperature control of liquids and baking. I must say that this is probably the most off-base recipe I have come across in my 25 years of baking. Even by weight (this is how most true bakers measure), this liquid-to-dry ratio is so far off (to the wet side) that you will quickly realize that there is no way to salvage this mess once they have been combined (you simply cannot add enough flour to get the ratio you need, not is it advised). This looks like it would be a terrible, sticky mess (regardless of the humidity in your home :”D ). Do not waste the flour and try a different recipe.
Hi Jemma! Thanks for your feedback. As this is an older recipe post (from 2014), it has not yet been updated with metric measurements, which is what we currently use to create our recipes. You are correct in that measuring by weight is best; however, did you try this recipe? The dough is a bit wet and sticky, but these rolls result in the most delicious outcome, a perfect copycat Hawaiian Bread Roll recipe. I hope you give it a try!
What an incredibly rude comment. Clearly plenty of people have reviewed this recipe saying it worked out perfectly for them – and I assume the other reviewers who have had success don’t have 25 years of bread baking experience. I don’t quite see the point of leaving a comment like this if you didn’t even try the recipe out.
Have you even TRIED the recipe? I don’t care how much experience you have, each recipe is different even if it’s in one minute way! Try first then post your assessment!
That’s just me anyway, I won’t be discouraged!
I find Jemma’s comment rude, uncalled for and not substanciated by facts, if you want to comment on something at least have the decency to try the recipe, …what a horrible person this successful baker is. Go have success in a cave, you are not needed in society,….this recipe makes people happy, perfecting it is part of the fun, take the info and play with it….it was given with a kind heart and should be taken with a kind heart…
I ditto that,Fred! Rude comment is not needed at all esp if you did not even have the gurs to try it! anyway today is my 2nd w this recipe, in 1 week time, thanks. Requests are abound fr my family. My 1st was delish n awesome as is ,but not enough pineapple taste in my opinion so this time I pureed some tidbits n mix in the juice to complete the 1/2 a cup needed. Came out just as I anticipated awesome x 2.
This is the perfect dinner roll recipe I’ve been searching for.. fluffy, slightly sweet and purely delicious. That turned out beautifully even after I forgot to add the melted butter. I had used buttermilk instead of regular milk and I’m certain that is what saved them. Easy to make and bake up beautifully
So glad you enjoyed this recipe, Shelia, and that your addition of buttermilk worked perfectly! 🙂
Can this recipe be made into a loaf bread instead of rolls?
Hi Angela! We haven’t tried that, but I don’t see why it wouldn’t work! Please let us know how it goes 🙂
The dough took two hours to rise double for me, the second rise an hour. I suppose it is because the bread is a heavier bread with eggs and milk. White bread is what I normally make and never takes more than 45 minutes to one hour to triple in bulk. I never add salt directly with yeast, it can kill the yeast, always add it separately so your dough will rise properly. My only issue was the long rise time is why I gave them a four-star rating. They ended up coming out soft, fluffy and wonderful!
Hi Bonnie! I’m so glad the rolls turned out perfectly! The rise time shouldn’t have taken that long though, do you live in a cold climate? What kind of yeast did you use, active dry or instant yeast? Did you use room temperature pineapple juice?
Great recipe! I’ve never had a lot of luck making dinner rolls, but this recipe was easy, tasteful and looked amazing! I had to take half of them to the neighbors as I knew I would be eating all of them myself! These are dangerously delish!!
haha, hooray!! I’m so please you love them!
Awesome recipe! I used 1 c guava juice, no milk. I also added a touch of red food colouring for a nice pink colour.
Just dumped it all in a stand mixer, had to let rise a lot longer since my house is cold. Mine were cooked after 17 minutes.
Perfect texture but not sweet enough for me. I used AP flour.
These rolls were an Easter hit! They’re huge; next time I’ll make 20 rolls. I refrigerated the rolled dough after step #4 overnight. Gave them an hour on the counter to come to room temperature the next day and baked per directions. Very yummy. I’ll make them again.
Trying this for the first time. How in the world do you divide into 15 equal parts? I do pretty good on even numbers of dough. Can’t figure this out. Rolls are proofing for last time now. Help for next time would be great.
Thanks,
Mike
Hi Mike, there will be 5 rows of 3 rolls. It fits perfectly in a 9×13 pan 🙂 Good luck!
whn I made this recipe, today is my 2nd already. I divided the dough in 2. then ea one I divided again into 6.n made 12 lil dough for ea 6, so I had 24 rolls. 12 in ea 9×13 pan. baked measurement is approx abt 2×2 in per bun wc is just perfect for me.
Can you use all purpose flour instead of bread flour ?
You may use all-purpose flour instead of bread flour, but the bread flour gives these rolls a perfectly round shape and chewy texture.
Easy and so yummy!
I don’t have bread flour can i use all purpose?
You may use all-purpose flour instead of bread flour, but the bread flour gives these rolls a perfectly round shape and chewy texture. I hope you give this recipe a try!
About how much is 1/2 can of pineapple juice? I have mini cans here.
I’ve made this twice now and love how easy it is to much together. I also love how soft the dough is when I take it out of the mixer.
The second time I used Lakanto Monk fruit sweetener rather than sugar. Slight after taste but still delicious.
Definitely a family favorite
I tried this recipe and it is a keeper ! It has great taste and beautiful soft texture
So glad you enjoyed these rolls!
Most recipes call for Buttermilk, what’s the baking difference between these milk vs Buttermilk
Hi Donald, check out my Buttermilk 101 article!
Hi, I tried to make the dough twice and for whatever reason it is super sticky. We live in Colorado so not sure if I need to do something different due to altitude. If so, I appreciate any guidance. Thanks.
Good flavor. i increased the sugar to 8 Tbsp because we like our rolls sweeter. I would say that the only downside to these rules is that they are very tall. About twice the height of store-bought Hawaiian rolls. So your ratio of bread to filling will be different. It could be that my rolls end up being taller because I use active dry yeast, and not instant yeast as the recipe calls for.
Absolutely delicious. I may have added a bit more than half a cup of pineapple juice to make sure the bread was sweet but no more than a cup. Thanks a bunch 😉 yummy
I’m so glad you enjoyed these bread rolls!
SOOOO happy to report these came out delicious and were so easy to make by hand. I don’t have a stand mixer. I used Tessa’s hand kneading dough method she discussed in another post. P.S Also my first time using bread flour. It was fun! 🙂
I’m so glad these rolls were a success for you! YAY!
Don’t know what happened, but these weren’t the slightest bit sweet for me. Don’t get me wrong, a good roll recipe, but they didn’t come sweet like hawaiian rolls for me. Thanks for the recipe, though!
Easy to make love it. Will make it again
So glad to hear that!
The rolls really ARE good. I substituted NOTHING, even buying bread flour for the first time ever. One can of pineapple in its own juice provided just the right amount for the recipe. My rolls did not look as pretty as the picture here. Someone asked about using a bread machine. The answer is YES, IT WORKS! I selected the ‘dough only’ cycle. After the dough rose in the machine I took it out. It were pretty sticky so I kneaded it a bit and shaped the rolls using extra flour. I will see what the dinner guests tomorrow think of the rolls.
I’m so happy you tried this recipe out! I hope it was enjoyed on Thanksgiving!
I’ve made these several times now and they never disappoint! I’m always asked to make the rolls for any gatherings now.
This makes me so happy, Cassie!
I love these rolls.
I’m making them the day before. So I’m wondering if I can just put the rolls in the fridge overnight for the second rise. Will they over-rise? Since it’s just overnight I hated to put them in the freezer – since you suggest and overnight thaw.
You can refrigerate the dough after it has risen for the first time for up to 24 hours! More detailed instructions included in my Make Ahead Baking Guide. Hope that helps!
Never mind I just read the notes at top. My bad and thank you!
Glad you found what you were looking for! I hope you love these rolls!
So I don’t have instant yeast but I do have regular yeast. So I should just let yeast rise in the warm milk and add to the other wet ingredients. It should still work the same way, right?
I just wanted to say that I’m making these for the third time today at the request of my son. He is nine years old and I love that the recipe is so easy that he can follow it pretty much on his own with just a little guidance so he doesn’t overwork the dough.
They are delicious. The only change I have made is that I oil the bowl I’m proving in slightly so that the dough comes out easily as it’s a rather wet dough.
So amazing you have a little helper with you in the kitchen! So glad you love these rolls.
I made these rolls and followed the recipe 100% These rolls were the worst. Hard as rocks and not very suite tasting. I used all fresh ingredients – including the yeast. And all temps for the liquids were at temps specified I would not make these again! There’s got to be a better way to make these!
I’m sorry to hear this! Usually hard rolls are due to too much flour being used, over-kneading the dough, or baking for too long. Be sure to check out my posts for how to measure flour and Oven 101. This is one of my most popular recipes, so I hope you give this recipe another try!
I made these with my teenage granddaughter and they smelled so good coming out of the oven she couldn’t wait for them to cool down. Absolutely will make again.
So glad to hear this, Mary!
These are just yummy! I have made them twice in the last 2 weeks. Thanks for a great recipe!
So thrilled to hear that, Mary!
Super easy recipe! My Hawaiian rolls turned out beautiful and delicious. My family loved it.
I did not have can pineapple juice. I replaced it with Tropicana orange pineapple juice. But first I microwaved it to kill the enzymes so it would not kill the yeast. The rolls rise beautifully.
Thanks Tessa for sharing this wonderful recipe.
Yay! So happy you tried these rolls out 🙂
Super easy recipe. The rolls turn out great and delicious! My family loved it!
i did not have can pineapple juice so I substituted Tropicana orange pineapple juice. But first I microwaved the juice for 2 minutes to kill the enzymes so it would not kill the yeast. It rise beautifully. Also I use only 4 tablespoon of sugar and it’s sweet enough to eat by itself.
Thank you Tessa for sharing this easy wonderful reciepe.
Thanks for the recipe. The dough came out very hard. I added half cup milk and 1/4 cup pineapple juice. Then the roll came out nicely.
Oh my! I made them-they were delish!
Perfect! First try and it came out perfect. We had no left overs; will be making another batch later today.
Officially a fan.
I accidentally used cake flour instead of bread flour so that was on me but I took a chance and added some regular flour to group it better and baked it and it actually tasted pretty good even though I messed up! I’ll have to use this recipe again but next time using the right type of flour.
I just used this recipe and it’s amazing, thanks so much! I made it with plain flour (in the UK, same as all purpose) and didn’t use a stand mixer but they still turned out really well. They’re a little rustic-looking, probably because of the flour, but they taste perfect! I’ve been craving Hawaiian rolls for ages and with no trip to visit my family in the States in sight, these fill the gap perfectly. Thanks!
Just made these and they were a hit at my loosely-themed luau Labor Day party.
I live in New Mexico (dry weather) in the Santa Fe area (high elevation), so I made a couple of changes I thought I would post in case anyone’s in a similar situation and would benefit. One of the biggest issues with elevation over 3k or so is that the dough will tend to rise way too quickly, so I used active dry yeast and all cold ingredients, except the melted butter, to slow things down a bit. The dough started out soft and a little sticky and it took about 2 hours to double in mass, which is exactly what I wanted. I weighed the flour, as I always do, and used all of it plus a heaping spoonful since it was going to proof a little longer. I ended up not changing the wet ingredients at all with the exception of a small splash of extra pineapple juice.
Once shaped, I let them proof again for about 45 minutes and until I thought they looked like they had regained their puffiness.
The experiment worked! They baked up very well and were delicious.
I have made this recipe twice now. It came out fantastic the second time around after I followed the instructions to the t (rooms temp pineapple juice, warm milk and melted butter to name a few). I also let the dough rise a little more than an hour for the first rise and 15 – 20 minutes more for the second rise. These came out perfect!
I also used only 4 cups of flour, so the dough was wet and had just stared to come together. Kneading for 4-7 minutes really got the dough together and it was not too sticky. Letting it rise for almost 30 mins longer the first time and 45-59 minutes after forming the balls really made the difference for me.