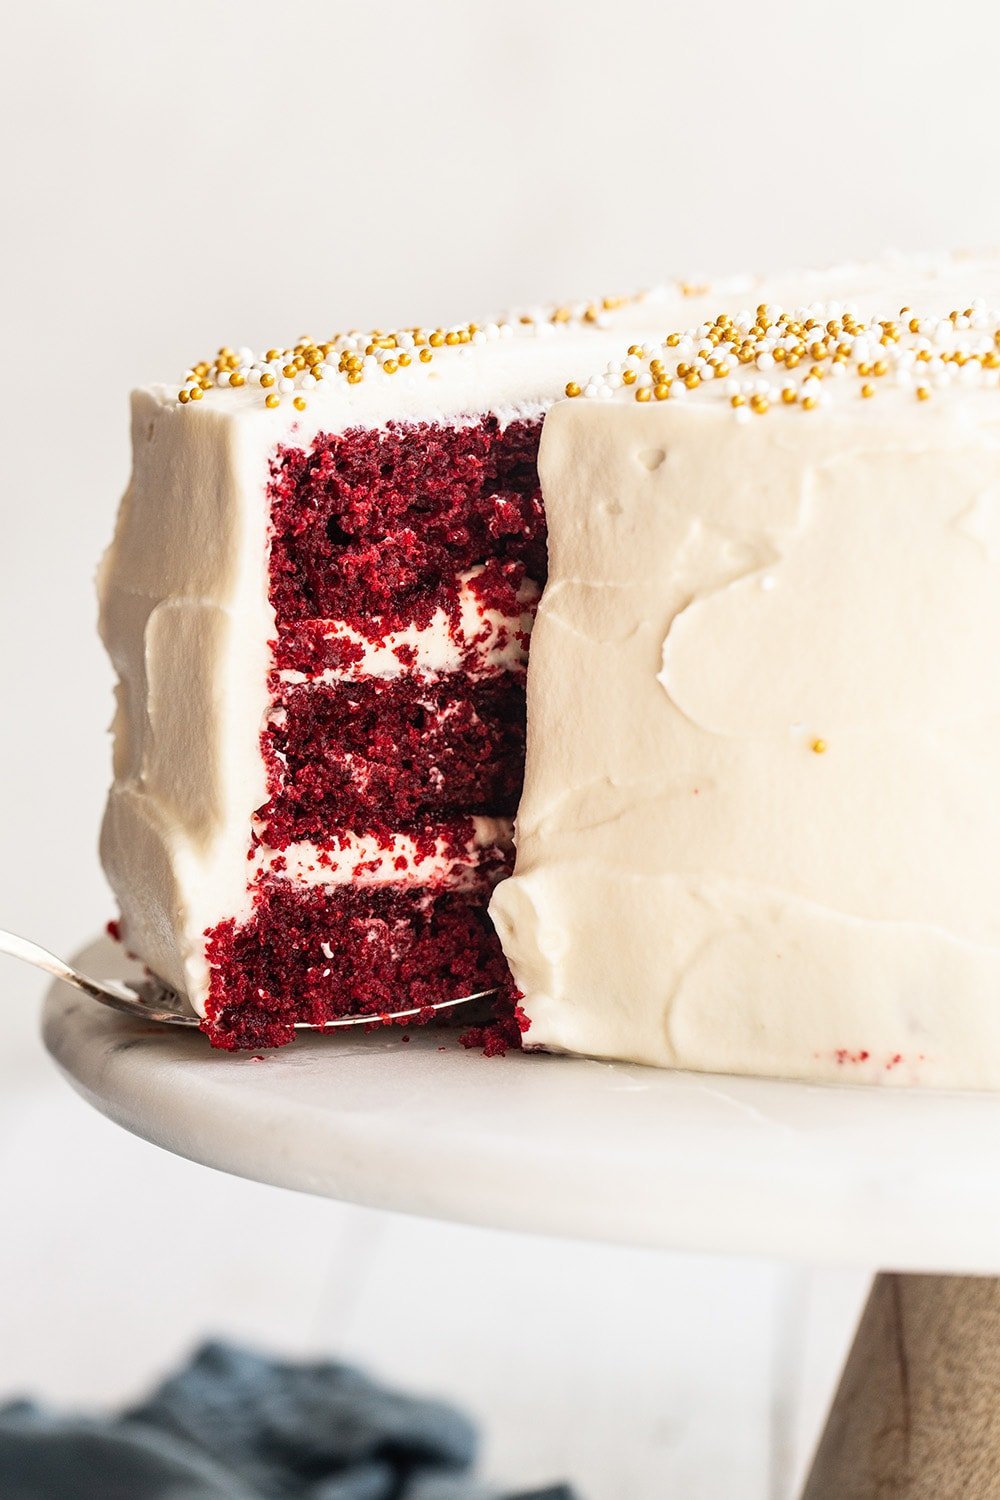
This post may contain affiliate links. Read our disclosure policy.
I’m very excited to share this recipe for Red Velvet Cake with Cream Cheese Frosting with you today, but first, I have something to say that may shock you…
I’m not a huge fan of red velvet.
I know it’s tremendously popular. But most red velvet type desserts that I’ve tasted have always been bland, dry, or sickeningly sweet. Plus, there can never be enough chocolate in my book so the tease of cocoa in red velvet cake kind of angers me if I’m being honest!
I’m happy to say I created a fabulous recipe that even I enjoy eating. This doesn’t mean I plan on giving up my chocolate cake anytime soon, but now I have a go-to red velvet cake recipe.
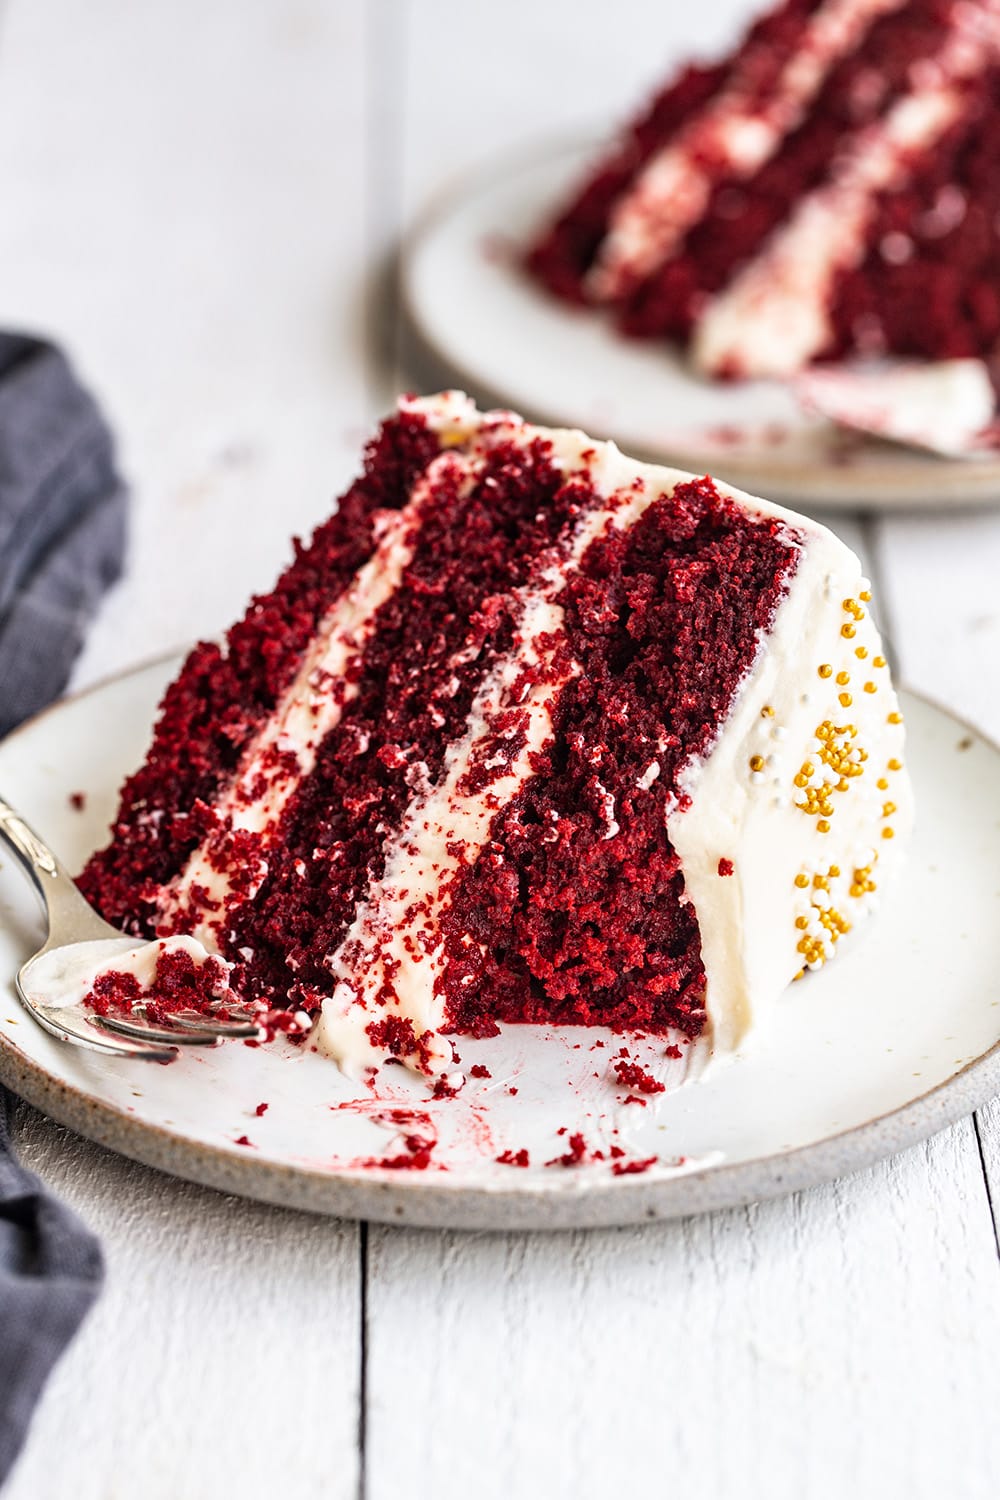
This cake is absolutely perfect for birthdays, Valentine’s Day, 4th of July, Christmas, or any time the red velvet flavor craving strikes. I wanted to make this recipe super easy, so you don’t need any cake flour!

How to Make Red Velvet Cake
What is Red Velvet Cake? Is Red Velvet Cake Just a Chocolate Cake with Red Food Coloring?
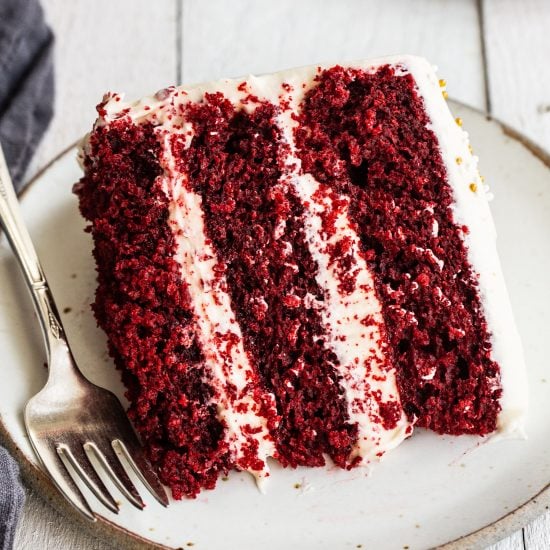
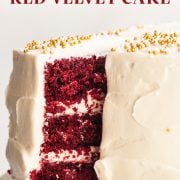
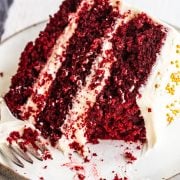
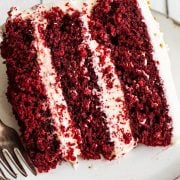
Red Velvet Cake is a popular dish in the Southern United States. Although traditional recipes vary from modern ones, it’s now typically made with a small amount of cocoa powder, buttermilk, vinegar, and red food coloring as staple ingredients. Its name references both its color as well as its soft, velvety smooth texture. It’s not really a chocolate cake, but simply has a hint of chocolate flavor.
Best Red Velvet Cake Baking Tip: Use ROOM TEMPERATURE Ingredients!
With the exception of the hot coffee / hot water, you really want to make sure your eggs and buttermilk are brought completely to room temperature. This will help to form a uniform and cohesive batter and cake.
Why Use Hot Coffee or Hot Water in a Cake Recipe?
Just like in my Best Chocolate Cake recipe, this Red Velvet Cake uses hot coffee as a staple ingredient. If you don’t have coffee, you can just use hot water. The coffee does help to enhance that hint of chocolate flavor, and the heat of the liquid helps to ‘bloom’ the cocoa, bringing out its full flavor.
What if I Don’t Have Buttermilk?
Buttermilk works best in this recipe to provide a rich and tender cake. It is traditional (along with the vinegar too!). You can learn more about the science of buttermilk in my Buttermilk 101 article here. I would not recommend using a buttermilk substitute. If you must, use whole milk instead but note the cake’s final taste and texture will be different.
What Kind of Food Coloring is Best for Red Velvet Cake?
I would highly recommend using gel food coloring for red velvet cake and not liquid or ‘natural’ food coloring. You’ll need at least 3 teaspoons, possibly more depending on the brand, so don’t buy just one small bottle (0.75 oz). Opt for a larger bottle or buy two smaller ones. I like Americolor or Chefmaster gel food coloring.
Overview Instructions of How to Make Red Velvet Cake:
Make the Red Velvet Cake Batter:
- Prepare three 8-inch round cake pans with parchment rounds, spraying parchment and sides of pans generously with nonstick cooking spray.
- Whisk together the hot coffee and cocoa powder, setting aside for 5 minutes. Whisk in a separate medium bowl the dry ingredients of the flour, baking powder, baking soda, salt, and cinnamon.
- In a large bowl, whisk together the sugar, vegetable oil, and melted butter. Add in eggs and egg yolk, whisking until well combined. Add buttermilk, vanilla, and food coloring, and whisk to combine.
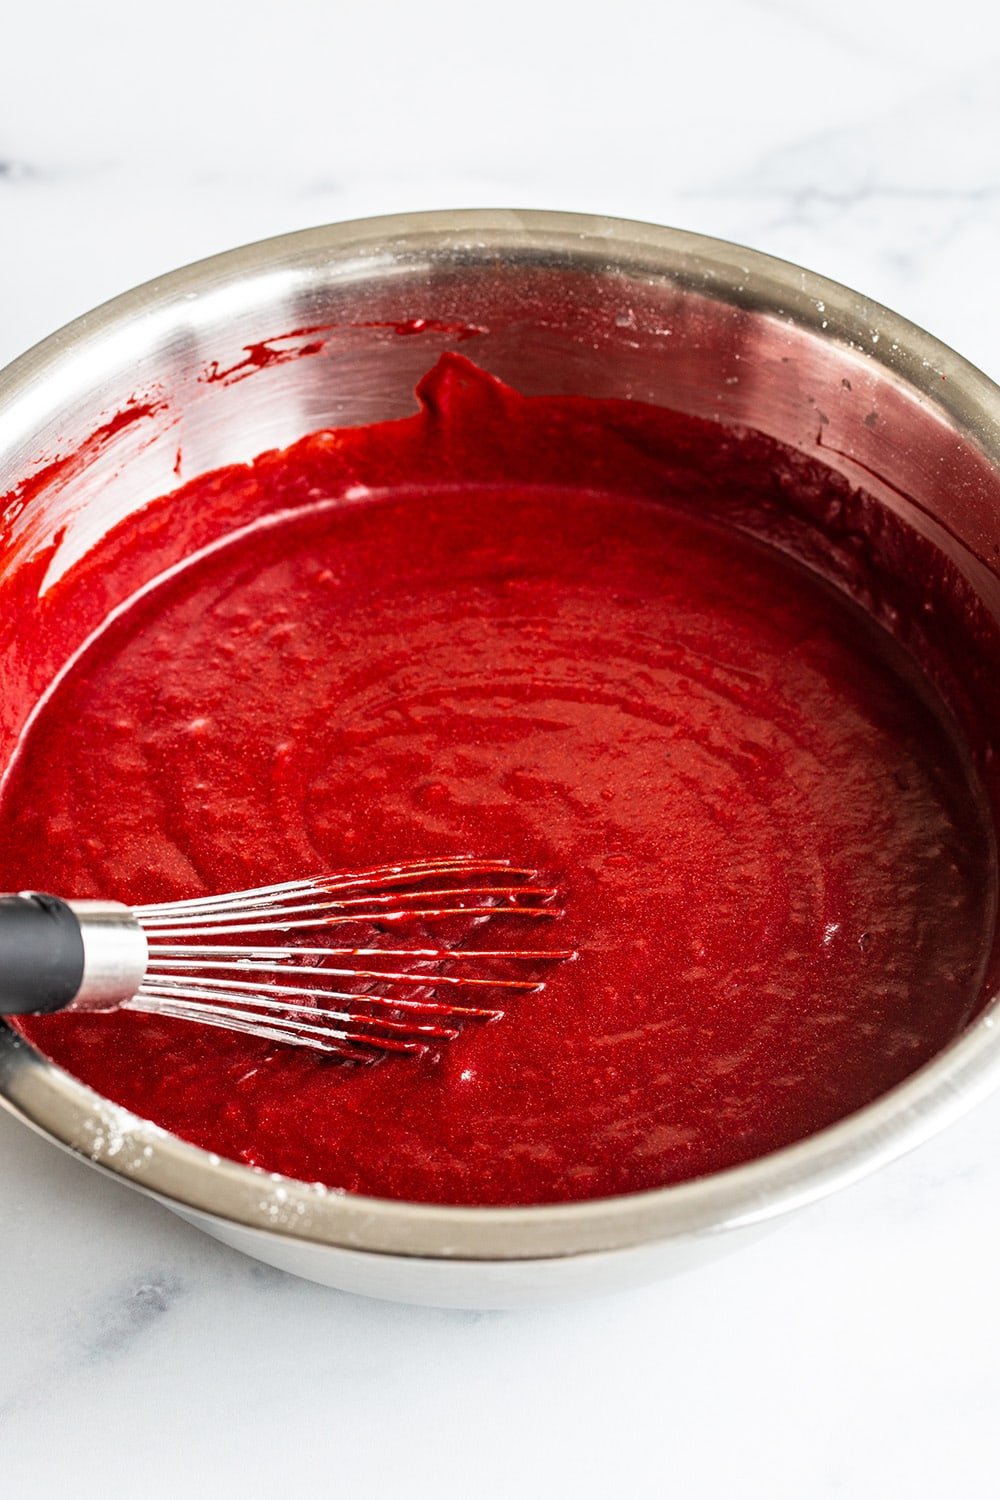
- Whisk in the vinegar and coffee mixture. Sift the flour mixture in thirds into the wet ingredients, folding until incorporated.
- Pour the batter evenly between your prepared pans. Tap the bottoms against the counter several times.
- Bake at 325°F for 25-30 minutes, or until a cake tester comes out clean.
- Place the cake pans on a cooling rack. Once cool to the touch, run a thin knife around the edges to loosen the cake, and invert onto the cooling racks. Cool completely.
Make the Cream Cheese Icing:
- Using an electric mixer fitted with the paddle attachment (or a hand mixer), beat the cream cheese and butter on medium-high speed until light, creamy, and smooth.
- Scrape down the sides and bottom of the bowl to ensure no clumps remain.
- Add vanilla and beat until combined.
- Gradually add in the confectioners’ sugar on low speed and beat until the buttercream frosting is fluffy.
Assemble:
- Lay one of the cake layers flat-side up on a cake plate or pedestal.
- Use about a third of the frosting to fill the bottom cake layer, then top with the second cake layer and repeat. Place the final cake layer flat-side up. Use the rest of the frosting to ice the sides and top of the cake, using an offset spatula to smooth the icing.
- Refrigerate until ready to serve!
What Kind of Baking Pans to Use for Red Velvet Cake?
Use three 8-inch cake pans for this recipe. My favorite brand of cake pan is Fat Daddio’s, they bake evenly and wash up easily. Don’t use darkly coated nonstick cake pans or you may end up with dry or overbaked cake edges.
Can I Use 9-inch Cake Pans Instead?
Although this recipe was specifically designed for 8-inch cake pans, you may be able to bake in two 9-inch cake pans. Fill each 3/4 full and increase the baking time by about 5 to 10 minutes because there will be more batter in each pan.
How to Prevent Red Velvet Cake from Sticking:
Be sure to line each cake pan with parchment rounds. I like these ones which have tabs to easily pull out the baked cake layers. Spray the sides of the pans and the parchment generously with nonstick cooking spray.
What Kind of Frosting is Best with Red Velvet Cake?
Cream cheese frosting is the classic choice for red velvet cake! Its tangy flavor complements the sweetness of the cake layers. If you’d prefer something more sturdy or want to make special cake decorations, opt for my Best Buttercream instead.
Favorite Tools for Layer Cakes:
Can I Make Red Velvet Cupcakes Instead?
Although this recipe was developed for cake layers, you can turn it into cupcakes in a pinch. Divide the batter among about 24 cupcake cavities, filling each 3/4 full, and bake for 17 to 20 minutes.
How to Make Cake Ahead of Time & How to Freeze Red Velvet Cake:
You can wrap unfrosted un-cut cooled cake layers completely in several layers of plastic wrap. Place inside a freezer bag or airtight container. Store at room temperature for up to 4 days or freeze for up to 2 months. Defrost overnight in the fridge (do not thaw at room temperature or you will end up with mushy cake).
How to Store Homemade Red Velvet Cake Recipe:
Cover with a cake keeper and store at room temperature for up to 6 hours, then refrigerate for up to 3 days.
More Red Velvet Recipes:
For the cake:
-
1/2
cup
of plain hot coffee or boiling water
-
1/4
cup
(21 grams) unsweetened natural cocoa powder
-
2 1/4
cups
(279 grams) all-purpose flour
-
1/2
teaspoon
baking powder
-
1
teaspoon
baking soda
-
1
teaspoon
fine sea salt
-
1/4
teaspoon
ground cinnamon,
optional
-
2
cups
(400 grams) granulated sugar
-
1/2
cup
(109 grams) fresh vegetable oil
-
1
stick (113 grams) unsalted butter,
melted
-
2
large eggs,
at room temperature
-
1
large egg yolk,
at room temperature
-
1
cup
buttermilk,
at room temperature
-
2
teaspoons
vanilla extract
-
3
teaspoons
red gel food coloring,
plus more if needed*
-
1
teaspoon
distilled white vinegar
For the cream cheese frosting:
-
16
ounces
(454 grams) cream cheese,
at room temperature
-
2
sticks (227 grams) unsalted butter,
at room temperature
-
2
teaspoons
vanilla extract
-
4
cups
(500 grams) powdered sugar,
sifted
For the cake:
-
Preheat the oven to 325°F. Line three 8-inch cake pans with parchment rounds and spray parchment and sides of pans generously with nonstick cooking spray.
-
In a glass measuring cup, whisk the hot coffee and cocoa powder. Cover and let stand for 5 minutes.
-
In a medium mixing bowl, whisk together the flour, baking powder, baking soda, salt, and cinnamon.
-
In a large mixing bowl, whisk together the sugar, vegetable oil, and melted butter. Add in the eggs and yolk and whisk for twenty seconds, or until very well combined. Add in the buttermilk, vanilla and food coloring and whisk to combine. Whisk in the vinegar and coffee mixture. Using a fine mesh sieve, sift the flour mixture into the batter in three additions, whisking until each addition is incorporated.
-
Divide the batter equally between the prepared pans. Tap the bottoms of the pans against the counter several times to release any air bubbles.
-
Bake for 25 to 30 minutes, or until a cake tester or toothpick comes out clean. It’s normal for the cake to look slightly spongy on top. Place the cake pans on cooling racks. When the pans are cool enough to touch, run a thin knife around the edges of the pans to loosen the cakes. Invert onto the wire racks. Let cool completely.
For the frosting:
-
In the bowl of a stand mixer fitted with the paddle attachment, beat the cream cheese and butter on medium-high speed until very light, creamy, and smooth. Scrape down the bottom and sides of the bowl to ensure no clumps remain. Add in the vanilla and beat until combined. On low speed, gradually add in the sugar and beat until fluffy, about 3 minutes. If the frosting is too thick, add a splash of milk or cream. If it’s too thin, add more sifted powdered sugar.
To assemble:
-
Lay one cake layer flat-side up on a cake plate or pedestal. Tuck in strips of baking paper under the cake edges to keep the plate clean.
-
Use about a third of the frosting to fill the bottom cake layer, then top with the second cake layer and repeat. Place the final cake layer flat-side up. Use the rest of the frosting to ice the whole cake. Serve.
-
The cake can be covered and stored in the refrigerator for up to 3 days.
*Don’t skimp on the food coloring. You will likely need more than one bottle if using a small container. I prefer Americolor or Chefmaster.
This post was originally published in 2013 and updated in 2022 with recipe improvements and new photos. Photos by Ashley McLaughlin.
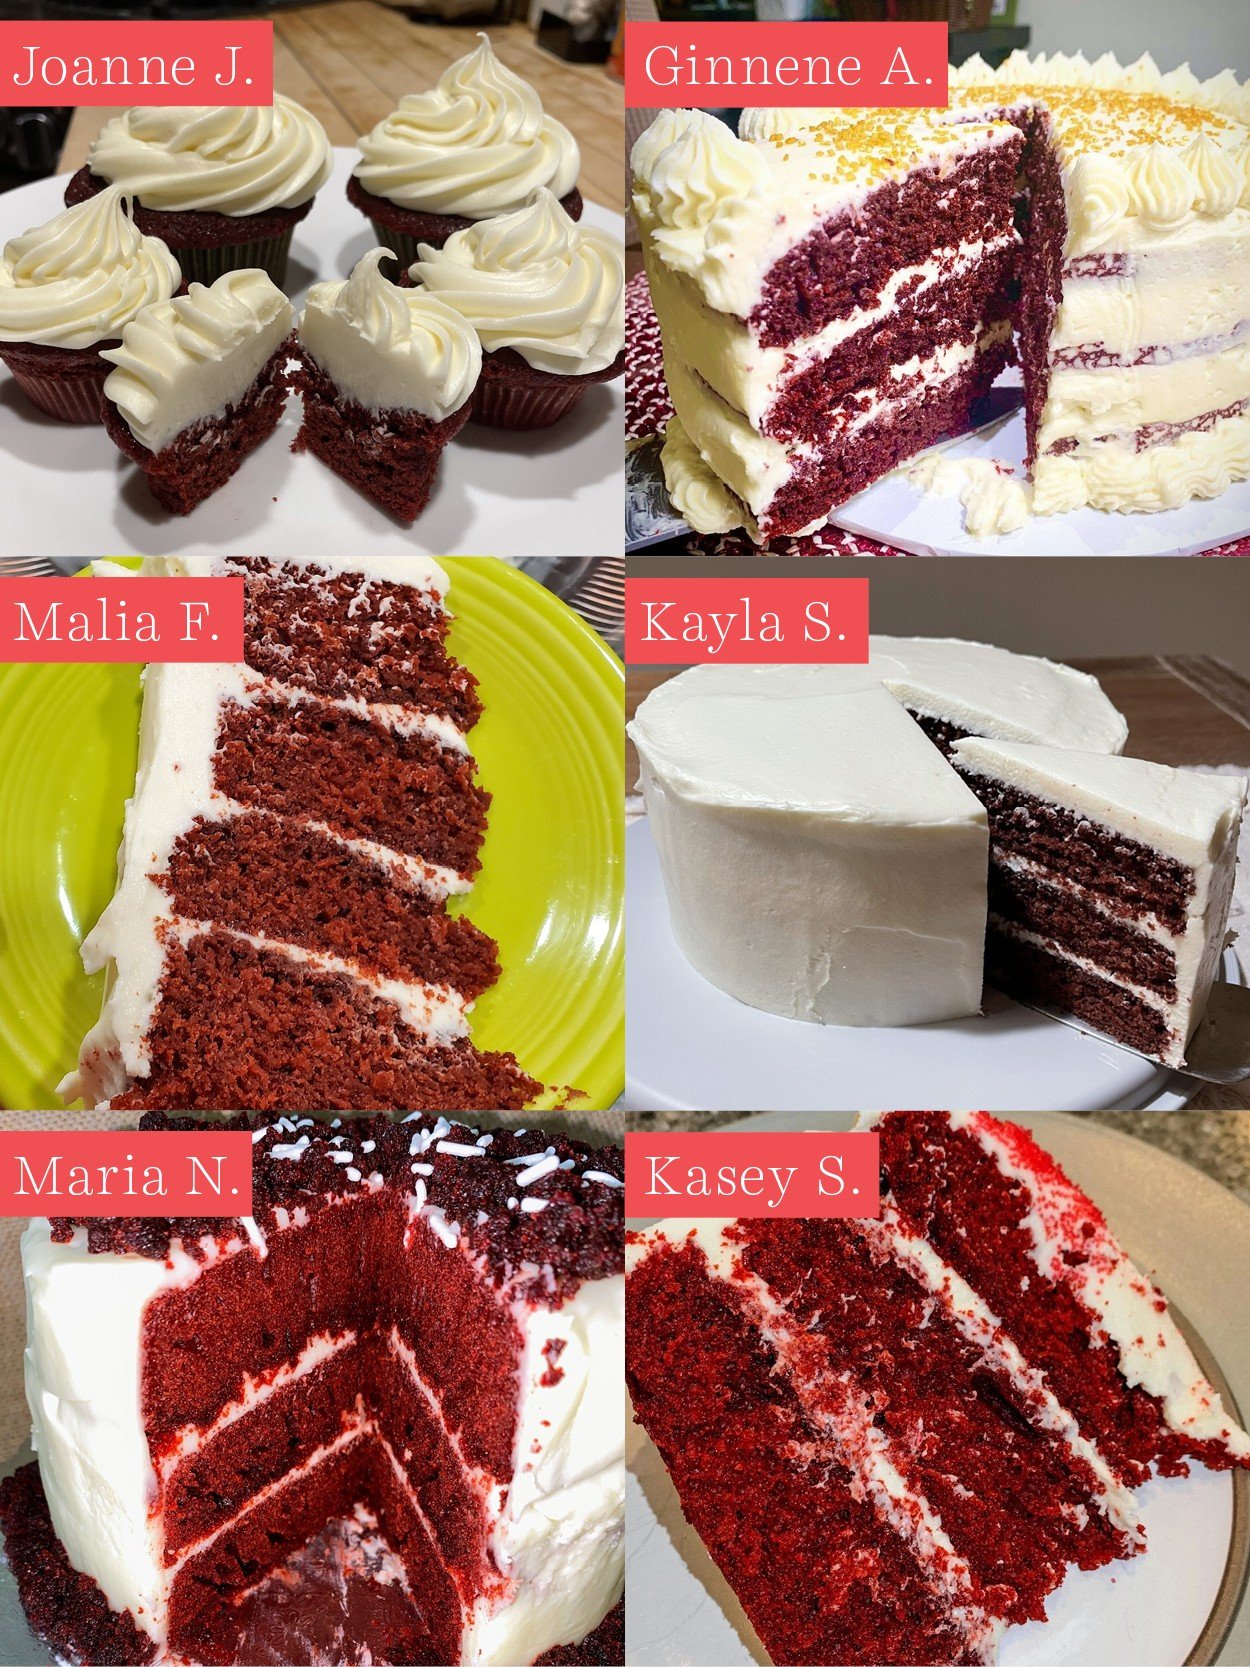
February Baking Challenge
This recipe was the February 2022 selection for our monthly baking challenge! Every month you can join the challenge by baking the recipe and snapping a photo for a chance to win prizes! Learn more about my monthly baking challenges here. Check out some of the cakes (and cupcakes!) baked by you guys:


We made it for my daughters b-day and everybody loved it!
So excited to hear that, Lebaron!! And happy birthday to your daughter 🙂
I made this cake today for my birthday. I was absolutely delicious! Best Red Velvet cake receipt I have ever tasted. I did make one small change and used cake flower instead of all purpose flour. In all of the recipes I have tried, I have found that cake flour makes it better.
Thanks Tessa for posting. This will definitely go in my cookbook as a keeper.
Pat from Brenham, Texas
Happy birthday, Pat! I’m so happy to hear that you enjoyed this cake!! 🙂
This recipe was AMAZING. I made it gluten free and non-dairy. The only substitutions was as follows:
I used Steve’s Gluten Free Cake Flour Blend. For the buttermilk, I used 1 cup of whole oat milk (room temperature) mixed with 1 tablespoon of distilled vinegar. I let it sit for 10 minutes. For the cream cheese, I used Better than Cream Cheese.
The cake was superb. It freezes well too!
So happy to hear you found this cake to be delicious, Sandra!! Glad those substitutions worked for you!
Absolutely the best red velvet cake we ever ate.. the only thing i did different was used 4 cream cheeses and it would have been plenty with 3 but not enough for me with only 2.. Will definitely be writting this one down in the books
So glad you found this cake delicious, Rebecka!!
This recipe was super easy to make and was so moist! Can you tell me how many cups of batter this yields? Trying to figure out how many recipes I will need to make to fill a 12 inch pan. Thanks so much!!!
Hi Laurie! I’m sorry but in all our testing for this delicious recipe, we did not measure how many cups of batter this makes! If it helps at all, we did note that the final batter weighs 1,416 grams (almost 50 oz). I hope that helps!
This is the best red velvet cake recipe I’ve made so far! Great taste and texture. My family loved it.
COLOURING: I used about 1/4 teaspoon Wilton red gel food colouring which was enough to give the cake a nice red colour. Doesn’t need the whole 3/4 teaspoons of colouring.
COFFEE: I usually opt for just hot water in recipes that call for coffee but I decided to try using decaf coffee in this; while the raw batter definitely tasted like coffee, I was happy that the coffee flavour did not come through in the baked cake.
ICING: I had a lot of icing left over, that being said I could have put more in between the layers.
PANS: This was my first time making a 3 layer cake and I only had 2 pans so I covered the excess batter with plastic wrap (directly on top) to prevent the air from escaping while the rest baked… it worked but I think I will be investing in another pan for the next time I make this 🙂
Hi Krista!! I’m so glad you enjoyed this red velvet cake so much!! Thanks so much for sharing your feedback! 🙂
This was the absolute best red velvet cake that I’ve ever made! I’m a huge baking snob and every recipe that I use has to have something special to make it stand out and this meets all of my requirements! I accidentally used a 10 inch pan, making the cake thinner than I would have liked, but it still tasted the same. It was so good that my family began to argue about who was getting a piece since there wasn’t enough for everyone! Next time I may double the batch just to keep the peace lol!
Hi Delaney! I’m so excited to hear that you and your family loved this red velvet cake so much!! Thanks so much for the comment 🙂
Can I bake this in a Bundt pan?
Hi Raadhiya! We haven’t tried that, so I can’t say for sure! This recipe calls for three 8-inch cake pans. Baking all the batter in one bundt pan may result in a dry cake, since it would be a much longer bake time, and you wouldn’t be able to layer the cake with the frosting in-between the same way. You can experiment and give it a try, but I honestly don’t know how well it will work. Good luck!
I made this recipe in a bundt pan and it came out delicious!
Hi!! I decided to make this for a friend’s birthday who loves red velvet cake. What color red should I purchase from the brand Americolor?
Hi Dawn! When making this Red Velvet cake, Tessa generally uses Americolor’s red gel dye called Super Red, but there are a few similar colors, such as Red Red, Electric Red or Tulip Red, all of which should work just fine, too! You should be able to find all these options on Amazon, or at your local cake supply store! Let us know what you think of the cake once you have tried it out! Happy baking! 🙂
Our friend’s mom (who passed a few months ago) used to make this cake (his favorite) for his birthday. I wasn’t expecting it to be like hers but thought I’d make the effort. He said, looking up, “Sorry Mom. This one is the best red velvet cake EVER.” I followed the recipe exactly and it was perfect. So moist and flavorful! Everyone (there are 6 of us that gather) wants it for their birthdays. I will say that there needs to be more frosting. As directed, it barely filled 2 layers while leaving enough for the top and sides. Maybe a another 8 oz of cream cheese? I’ll try that next time. I’d rather have too much than have to skimp between layers. Also, just fyi – it was a very hot day (110 degrees outside) so even with the air conditioning going, I had to refrigerate the frosting so the layers wouldn’t slide off. Once firmed up in the frig, it worked fine. This will be my “go-to” red velvet cake recipe from now on!
Hi Elena! What a sweet story! I’m so happy this recipe could help brighten your friend’s birthday, and I’m sure his mom would love that you made such an effort! Thank you also for the feedback about the frosting!
Can this be made with cake flour or is the gluten protein too low for it? This cake does not seem to be too heavy, just wondering.
Why use coffee? This is not a true chocolate cake I know that coffee enhances the taste of chocolate.
I am from the Deep South we are very familiar with Red Velvet cake.
Hi Linda! The coffee helps to enhance that hint of chocolate flavor, and the heat of the liquid helps to ‘bloom’ the cocoa, bringing out its full flavor. If you prefer, though, you can just use hot water instead of the coffee! As for the cake flour, we have not tried this recipe with cake flour, but I think it would make this already-delicate cake far too delicate. You can absolutely try it out for yourself, but I would recommend sticking with the all-purpose flour for the added structure the extra protein gives! I hope that helps! Happy baking 🙂
The best red velvet ever
So glad you loved this cake, Iveta!
Hi Tessa. I’ve seen the reviews on this recipe and would love to try it out soon.
I just want to know if I can halve the recipe, reduce the amount of sugar and also use buttermilk substitute as it’s not readily available in the supermarkets in my country.
Hi Edima! We haven’t tried halving the recipe, so I couldn’t say for sure, but Tessa talks about how to turn this cake into cupcakes, in the pink tip box above the recipe! We highly recommend using real buttermilk, if you can, but using a substitute should work, if you cannot find the real thing (just note, the final taste and texture will differ as a result). Read Tessa’s article about buttermilk and various substitutes before you start, though! As for the sugar, we really recommend sticking with the original quantity of sugar in any recipe, for many reasons. Sugar doesn’t just sweeten baked goods; it moistens, provides tender structure, assists with gluten formation, extends the shelf-life (meaning it will be fresh and moist longer), and assists in creating a taller and lighter finished product – just to name a few things! Reducing the sugar content in a recipe doesn’t just lower sweetness; it messes with the recipe’s chemistry and creates a totally different baked good. I hope that answers your questions! Please let me know if you need any further assistance!
Hi. I don’t understand the last part of the method.. Do you combine the wet and dry ingredients or what? What do you mean sieve in the flour 3 times in what?
Hi Zeenat! Yes, you combine the wet and dry ingredients in the final step. The instructions specify to sieve the dry into the wet, because this is a delicate cake, so we want to really make sure there are no lumps or clumps of flour, leavener, etc!
You will mix the dry in one bowl. Follow the directions for mixing the wet together in a separate bowl. Then, when all the wet ingredients have been combined per the instructions, you will use a fine mesh sieve to sift the dry mixture into the wet mixture in three additions (not three times; just one third of the dry mixture at a time). Again, we are just taking extra precautions to ensure no lumps end up in the batter!
I hope that helps and makes more sense to you now! Happy baking! 🙂
This is an amazing recipie and I have tried other red velvets, one from preppy kitchen and one from sugar geek show but this recipe is hands down the best ever red velvet. I’m a cake decorator so it’s important to have amazing recipes this will definitely be the one I use for all my customers requests for red velvet. It’s a big win
And the added cinnamon gives the cake a great taste.
Hi Tania! I’m so excited you loved this recipe! So happy it works for your cake decorating 🙂 Thank you!
Hi! Thank you for this! But do I make this recipe into a 6 inch round pan?
Hi there! This recipe, as written, will make three 8″ cake layers. We have not tried making the recipe in 6″ pans, but you can try! Just watch that you don’t overfill your pans, as we wouldn’t want them to overflow in the oven! You will also need to watch your bake times carefully, as they will be very different from the recipe as written. Bake just until a toothpick inserted comes out clean, and no longer than that (to avoid dry cakes!). I hope that helps! Let us know how you like the recipe, once you have tried it! 🙂 Happy baking!
OMG I made this cake just yesterday as a birthday cake for my mom as she loooves red velvet. Well this is my new go to recipe! This cake was moist, delicious and the frosting was perfect! The only thing with my cake is that it wasn’t overly red after adding the cocoa/ coffee mix, but certainly not a deal breaker. I also did not have the gel food colouring so that may have been the reason.
Anyhow Tessa I have never been to your site before but you now have a repeat customer. Thanks for sharing!!
I’m SO happy you loved this recipe, Francine! The gel food coloring will make a huge difference in the future, but I’m so glad it was still delicious, regardless of the color! We can’t wait for you to try more of Tessa’s recipes 🙂
Delicious! This cake turned out perfectly. I followed the recipe exactly – I just used 2, 9-in pans and baked for 30 min, rotating the pans halfway through. It was so moist. Everyone raved about it. Thank you!
So happy to hear that, Jamie! Glad you enjoyed this recipe 🙂
Loved this recipe. Like Tessa I didn’t have a favorable impression of RV Cakes as all previous ones I tried seemed to be a vehicle for the cream cheese.
I made these into mini Bundts using the Nordic Ware 6-cavity Bundt pan. I baked for 20 minutes but I believe it can be checked at 15 minutes for doneness. These tasted great without icing.
Fantastic! So happy to hear they turned out beautifully in mini bundts too! I’m not a huge fan of rv cakes either, but this have become a favorite in our house 🙂
This recipe looks wonderful – how can I adjust the measurements to bake a mini cake for my daughter’s 1st birthday cake smash?
So fun! We haven’t tried baking this cake in smaller pans, so I can’t say for sure! I’d suggest using Wilton’s handy cake serving guide for more help. You could always make the entire recipe, but follow the instructions in the pink box above the recipe to bake any leftovers as cupcakes too 🙂 Let us know what you think of this recipe when you give it a try!
Can I make this recipe using two–9 inch round pans? If so, how long should I bake?
Thanks!
Hi Lynn! Check out the pink tip box above the recipe, we included details on how to bake with 9-inch pans there 🙂 Let us know what you think of this recipe when you give it a try!
This is the best red velvet cake recipe, hands down! It’s moist and chocolate-y: two components other recipes that I’ve made have lacked! The only alteration I made was using a little less sugar for the frosting than the recipe called for. 🙂
So happy you love this recipe!
Whoops!
CHECK FLOUR MEASUREMENTS
Made the fatal mistake of not double checking cups to grams. Conversions can be different for different ingredients.
Trust your instincts too!
Hi Tessa, can this be made in a sheet pan?
Hi Karyn! We haven’t tried that, so I can’t say for sure how it’ll turn out, but you’re welcome to experiment! Let us know how it goes if you do 🙂
I made this for the monthly baking challenge but didn’t try it until the next day which was March . It was absolutely best red velvet cake ! I think its the cinnamon added but no matter delicious!!! Highly recommend it. I am making it again for my coworkers this week!
So happy you loved this cake!
Love this recipe. I’ve tried many Red Velvet recipes throughout the years but this one really seems to nail it. I think it’s also an improvement from the one published years ago. I made two different 3 -layer cakes (8” cooked for 14 min each) one with the cream cheese frosting as listed and the other cake I used HTH Swiss Meringue buttercream frosting. (The recipe is for one 3 layer cake). Both cakes were both excellent but my family found the cream cheese frosting a tad too sweet and really loved Tess’s Swiss buttercream with this cake.
Excellent
Lol. The deadline was my last day for a fast so I made the cake but won’t get to eat it until tomorrow and will share at the ministry class I have tomorrow night. But the cinnamon was great addition to other recipes I’ve made so I look forward to it. Smelled excellent when making it!
This recipe for red velvet cake was beginner friendly. I followed it to a t and thankfully didn’t encounter any hiccups along the way. The cake itself is delicious and super moist. My family and I enjoyed it. I highly recommend this for anyone looking for a great recipe for red velvet. It is beautifully written and explained in great detail. Yes it is time consuming and you will have a lot of dishes to wash but I’m telling you stick with it. You will love the end result!!!
So happy you loved this recipe!
I had never made a red velvet cake before. This one was delicious. Not too sweet. Not dry.
I really enjoyed this recipe! It was so… moist lol and the cream cheese frosting made it even better.
great
Made mini-cupcake versions of this recipe for a large community gathering…I believe it made about 48 mini-cupcakes, and I came home with less than half (there were a LOT of food and deserts brought). People really loved them–the cake is very moist and tender, with a delicious flavor, and the cream cheese frosting wasn’t difficult to make pipeable with a strong extra does of powdered sugar. When everyone was cleaning up, some of my fellow amateur bakers there grabbed 3-4 to take home for themselves. 🙂
We love Red Velvet Cake and Tessa’s recipes are great for directions and tips!
Tasted great, but the cakes were very difficult to work with, kept breaking apart.
Sorry to hear you had issues with your cake, Celeste! Do you use a digital scale to measure your ingredients? Was your cake fully cooled before icing?
Excellent and tasty recipe.
I made this cake for a group valentines dinner and everyone said it was the best red velvet cake they have ever had! I also added a touch of extra nutmeg and cinnamon and I was so happy with how this recipe turned out (tasted like a red velvet donut with the nutmeg). Red velvet has always been one of my favorites but this recipe will be a new go-to!
Love the additional spices! So happy this recipe is now your go to!
Best red velvet cake ever! I appreciate how moist it is.
This cake was soft and moist. The combo of cocoa, cinnamon and coffee made it taste amazing! I loved the flavor!
Super moist & delicious!
Delicious! Moist and fluffy. Easy to make. Thanks for sharing this recipe Tessa!
This cake was extremely dense and decadent. I would change some things about the cream cheese frosting and maybe 1/2 the recipe, but that’s personal preference.
This cake is absolutely delicious! And that forbidden word, moist! I will definitely be making this recipe again. Once again Tess, you did not disappoint!
So happy you loved this recipe!
One of the best red velvet cakes I have ever tasted! Loved how moist it was as usually red velvet cakes can be quite dense. Will definitely make it again in the future!
I just made this cake last night and WOW it’s so moist. I used it for 2 layers of 9″ pans and it came out so gooooood.
The cake tasted delicious! I think this is the best red velvet cake recipe I’ve tried. I baked it as instructed, however after 25 mins the cake was still extremely gooey and undercooked, so (as I was pressed for time) I increased the oven temp (which I shouldn’t have done) and baked it for longer, until I noticed the top had burned. XD When I assembled the cake I just cut the top off each one and it tasted great!
Glad this recipe still worked ok! Do you have an oven thermometer? Also, what kind of pan did you use to bake your cake in?
This recipe is absolutely delicious, as is any recipe Tessa shares! And it’s simple enough to follow that mine turned out perfect even though my oven is broken and I had to bake it in my toaster oven!
So great to hear that (not that your oven is broken, but that your toaster oven worked)!!
This recipe turned out so well. Yay! Love the buttermilk taste and how moist it makes the cake.
Delicious! The cake was moist and flavorful and the frosting was perfect! We added a some chocolate ganache on the top. Thanks for another great recipe!
Great idea for the topping!
This cake is delicious and moist, very easy to make.
I reduced the powered sugar in the icing and it was perfect.
Super moist cake with easy to follow directions. Will definitely make again.
Very good recipe of Red Velvet cake !!
This was a big hit!
I loved it, husband doesn’t care for cream cheese, more for me, lolol
Excellent recipe. I made cupcakes without the red food colouring and they turned out great.
Fantastic recipe! I love the cream cheese frosting and the suggested red food coloring was vibrant. Thank you!
Fantastic recipe! I love the cream cheese frosting, and the suggested food coloring is vibrant. Thank you!
Delicious, moist cake recipe. Cake layers were a little thin so I will probably use 3 6” pans next time. Frosting wasn’t too sweet and provided the perfect balance to the cake. Will definitely make it again!
Cake was rich in chocolate flavor and moist. Will definitely use this recipe again.
Amazing